Wednesday, October 27, 2010

A New Bread for Fall


I combined a couple of recipe to create this lovely pumpkin cranberry bread for a potluck my husband was having today at work. The theme was "healthy eating" and one of the categories was gluten free. So, I decided to make this bread since I had some pureed fresh pumpkin and fresh cranberries from the farmer's market on hand.

And....I won a $20 cash prize for this bread in the gluten free category! It was fun and exciting to win!

This wonderfully moist gluten free, dairy free, soy free bread is so delicious it is more like cake! You could never tell it is gluten free or made in any other way than the traditional way of baking.

I know that this will become one of the favorite fall treats in our household.

I learned a lot about gluten free baking when we had Farmer's Tea- selling our baked goods at a farmer's market. There were many customers who came to appreciate our growing selection of gluten free treats. So, I love to combine recipes and create many new gluten free baked goods to try. Also, since we have a couple of friends who need to eat gluten and dairy free- having these types of things on hand is always great!

Enjoy this lovely bread!

First of all- before baking you need to create a special flour mix. If you live locally (in Oregon) I have found all three of the flours available at New Seasons- or if you go to Bob's Red Mill in Milwaukie, Oregon you can buy these flours in bulk which saves a lot of money.

The flour mixture is as follows (I usually mix up a large batch and store it in a zip lock bag or a storage container) I got this mixture idea from "Gluten Free Baking Classics" by Annalise G. Roberts. It is a wonderful book and a great one for coming up with baking ideas.

Small Batch of Gluten Free Flour:

2 cups brown rice flour
2/3 cup potato starch
1/3 cup tapioca flour

Large Batch of Gluten Free Flour:

6 cups brown rice flour
2 cups potato starch
1 cup tapioca flour

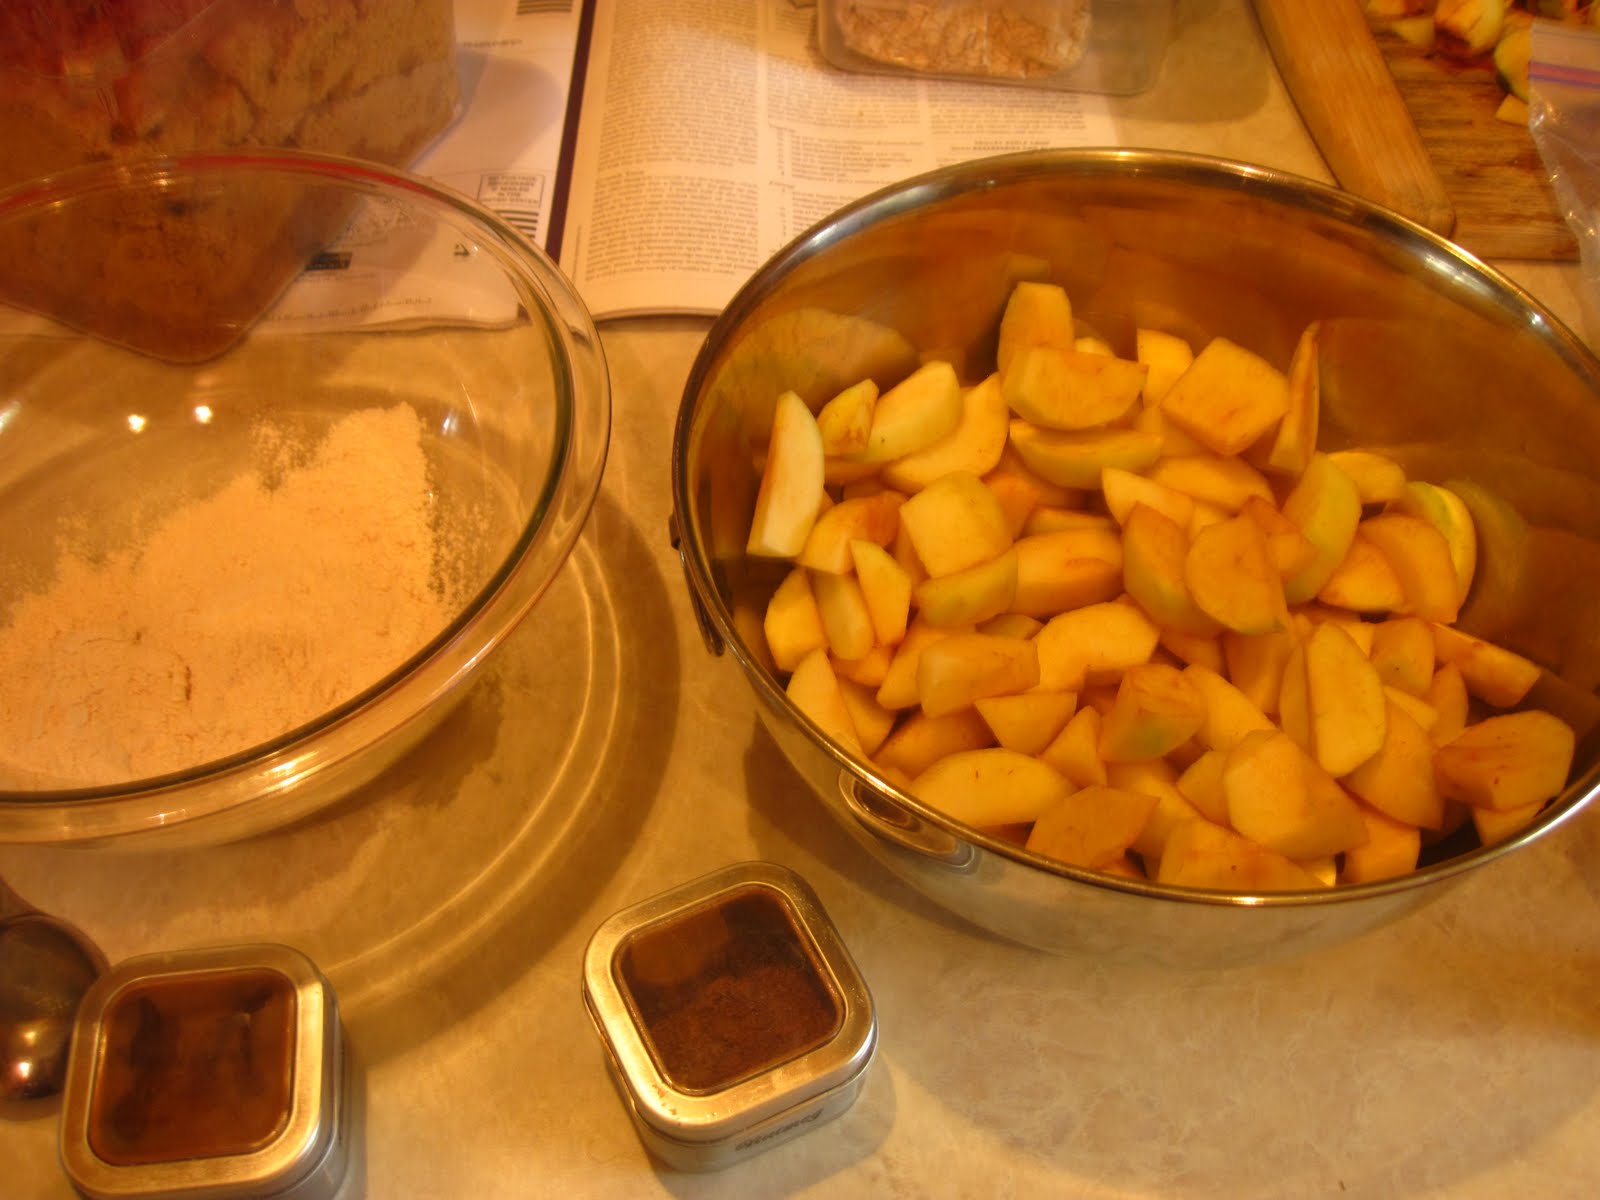
The only other ingredient that is essential to gluten free baking is xanthan gum which helps hold the flours together and helps prevent baked goods from being too crumbly. It can be found in most stores. It is expensive but only a bit is used in each recipe and it lasts a long time. Below you can see a photo of all of the ingredients laid out:


Gluten Free Pumpkin Cranberry Bread:

Makes three 8x4 loaves- they freeze wonderfully!

Ingredients:

Dry Ingredients:
  • 3 cups brown rice flour mix (if you don't need to make this gluten free substitute all-purpose flour)
  • 1 teaspoon cinnamon
  • 1 teaspoon nutmeg
  • 1/2 teaspoon ginger
  • 1/4 teaspoon ground cloves
  • 1 1/2 teaspoons xanthan gum
  • 2 teaspoons baking soda
  • 1 1/2 teaspoons sea salt
Wet Ingredients:
  • 3 cups granulated sugar
  • 1 (15 ounce) can pumpkin puree (or use fresh pumpkin that you have baked and pureed yourself- be sure to use a pie pumpkin or other sweet pumpkin for this
  • 4 eggs
  • 1 cup vegetable oil
  • 1/2 cup orange juice
  • 1 cup fresh or frozen cranberries-chopped

Directions

  1. Preheat oven to 350 degrees F (175 degrees C). Grease and flour three 8x4-inch loaf pans.
  2. Combine flour, spices, xanthan gum, baking soda and salt in large bowl. Set aside.
  3. Stir together sugar, pumpkin, eggs, vegetable oil and orange juice in bowl; beat until just blended. Add pumpkin mixture to flour mixture; stir just until moistened. Fold in cranberries. Spoon batter into prepared loaf pans.
  4. Bake for 55 to 60 minutes or until wooden pick inserted in center comes out clean. Cool in pans on wire racks for 10 minutes; remove to wire racks to cool completely.


Enjoy a lovely slice of fall!!

Layers of Comfort Food


A couple days ago while it was rainy and cold outside I wanted to create something warming for dinner to take the chill off. This delicious and easy casserole fit the bill!

I took the original recipe and changed it to make it more flavorful and through this I have learned even more- and have changed a couple more things to end up with the recipe below. This is a great recipe because it is quick, healthy, easy and makes great leftovers. You could even make two and keep one in the freezer for later.

This casserole is also great because you can add ground beef, chicken or substitute black or pinto beans for the meat to make it a vegetarian meal. It is very versatile and delicious! Enjoy!

Tex Mex Tortilla Lasagna:

Makes 6-8 servings

2 cups tomato sauce
1 teaspoon chili powder
1 teaspoon ground cumin
1 teaspoon oregano
1 teaspoon garlic powder
1 teaspoon salt
1/2-1 jalapeno pepper- chopped-(seeds removed)

12 corn tortillas
1 cup ricotta cheese
1 teaspoon chili powder
1 teaspoon garlic powder

1/2 pound ground beef (or 1/2 pound chopped chicken, or 1 can black or pinto beans- drained and rinsed for filling)
1 onion, chopped
1 tablespoon taco seasoning or Mexican spice mix
1 teaspoon salt

1 can stewed tomatoes
1 bell pepper, sliced into rings
1 cup shredded mozzarella cheese

Preheat the oven to 350F

1. Spray a 13x9 casserole pan with non-stick spray- or oil it with olive oil.
2. Combine tomato sauce with spices, salt and jalapeno pepper. Set aside.
3. Heat a pan with olive oil in it. Saute the onions and the beef or chicken in it until thoroughly cooked. Add the taco seasoning and salt towards the end of cooking and mix together. If using beans for a vegetarian dish- add the beans to the pan with the onions and mix them together with the spice and salt.
4. Arrange 6 tortillas in the bottom of the pan, add a little tomato sauce mixture on the top and spread it around.
5. Mix the ricotta cheese, chili powder and garlic powder together. Add this mixture in a layer.
5. Add another layer of 6 tortillas and top with the chicken, beef or beans (your choice). Add remaining sauce and stewed tomatoes. Top with bell pepper rings, cover with a lid or foil and bake for 1 hour.
6. After 1 hour uncover the casserole and sprinkle with cheese. Bake another 10 minutes more. Remove from the oven and wait 10 minutes before serving


Enjoy this lovely meal! This photo shows a serving of the lasagna along with one of the pretty napkins my mom sewed for me a couple of years ago to go along with some place mats she made.

Tuesday, October 19, 2010

Soup's On!


Since the fall chill is now in the air it's officially soup season around here! Soup is such a warm, comforting food and this soup is one of my all time favorites- it has two of my favorite things..cooked tomatoes and peanut butter in it!

Yesterday I decided to make this soup and serve it over brown rice as I often do. I did serve some corn on the cob on the side- but really with the rice it's quite a complete meal all by itself!

I got this recipe from a family friend who loves to make soup too! I have changed the recipe a slight bit by adding more peanut butter and a bit more broth and chicken- but it is basically the same as the original.

Here it is and enjoy...

West African Chicken Peanut Soup-serves 6-8

2-3 cups cooked chicken- diced (I usually bake 2 large boneless, skinless chicken breasts in the oven and then use those)
1 medium onion- diced
2 garlic cloves-minced
2-3 tablespoons olive oil
1 1/2 teaspoons curry powder
1/2 teaspoon salt
1/2 teaspoon freshly ground black pepper
1/2 teaspoon red chili pepper flakes
4 cups chicken broth
1 small can tomato paste
1 15 ounce can stewed tomatoes
1/3 + cups of peanut butter

--6-8 servings of brown rice to serve soup over

1. In a large pot (I use a cast iron pot) heat the olive oil and saute the onions, garlic and chicken for about 10 minutes until the onion is tender. Add the curry powder, salt, pepper and red pepper flakes and saute 1 minute more.

2. Add the chicken broth, tomato paste, stewed tomatoes and peanut butter, (add more peanut butter and taste the soup to make sure the seasonings are to your liking) stirring until well combined. Heat the soup until very hot but not boiling. Serve immediately or cool in the refrigerator and serve later.

Enjoy this fabulous soup!

Thursday, October 7, 2010

I "Hallah" for Challah!


This week since I hadn't made bread in a while I decided to make something different. Also, I had a lot of eggs to use and I wanted to use them in a delicious way! I had made this recipe before- given to me by my cousin Helen who clipped it out of the Oregonian newspaper a while back and sent me a copy. However, I think that my "new and improved" version is even better!

This is one of the softest, best tasting, fluffiest breads I have ever made! And, it is so easy to make!

The original version is not whole wheat and it also contains less yeast than my version. I have found that adding more yeast helps a bread rise more, be softer and fluffier- so I decided to double the amount of yeast in the recipe and got fabulous results!

Try it for yourself and you will see!

This is great hot out of the oven with butter on it, or toasted the next day- or for sweet sandwiches such as peanut butter and jelly. Enjoy! Below you can see a picture of the loaves ready to be put into the oven! Yum!


Whole Wheat Challah Bread:

Makes 2 large loaves

1 1/2 cups very hot tap water
8-9 teaspoons active dry yeast
2 tablespoons firmly packed brown sugar
1/3 cup canola oil
1/2 cup honey
2 teaspoons sea salt
4 eggs plus 1 additional egg yolk (divided)
4 cups unbleached white bread flour (I used King Arthur)
2 cups whole wheat flour (Again I used King Arthur)
1 tablespoon water

Sesame or poppy seeds

1. In a large bowl combine warm water, yeast and brown sugar. When the mixture is foamy and bubbly, add canola oil, honey, salt, 3 eggs and the additional egg yolk.

2. Stir in 3 cups of the bread flour and 2 cups of the whole wheat flour 1 cup at a time. I stirred this mixture by hand with a wooden spoon. Stir until the dough begins to stretch as it is stirred. You can also use an electric mixer if you like. Turn the dough onto a lightly floured surface and knead by hand. Work in an additional cup of the bread flour. Be sure to only add as much as needed to make a smooth dough.

3. Oil a clean bowl or spray it with nonstick spray. Roll the dough around the bowl to coat the surface. Cover the dough with a clean, damp cloth and let it rise for about 2 hours. Punch down the dough.

4. Shape the dough into 2 loaves. I left my 2 loaves very large. I didn't stretch them out into long, skinny loaves. I divided each loaf into 3 "strands" and braided them loosely. Cover the loaves and let them rise for another 45 minutes to an hour.

5. Make an egg wash by beating the remaining egg with the 1 tablespoon of water. Brush the egg wash over the loaves.

6. Heat the oven to 375F. I have a convection oven so mine was set to 350F. Bake the loaves for 15 minutes on the middle rack. Then, brush with more egg wash and sprinkle the loaves with sesame or poppy seeds. Bake for an additional 15 minutes. Be sure to check the loaves often so that they don't over bake. The loaves should be golden brown. Cool on wire racks.

Enjoy your bread!!

Friday, October 1, 2010

Harvest Time


This week we harvested some dry beans, tomatoes, potatoes, green beans, basil and cucumbers. We are trying to harvest every last bit we can to get the most use out of what we planted.


Some of the potatoes are one inch in diameter and the tomatoes have spots but we don't care, we'll take what we can get at this point! We recently heard a master gardener say that this was the worst gardening year he had ever had in Oregon- we would have to agree.


The cucumbers will be made into pickles, we will freeze the green beans and shell the dry ones. We are going to wash the potatoes and spread them out and cover them to harden off.

I (Trista) have been drying tomatoes in my food dehydrator and saving them to put in jars with some of our fresh basil and olive oil. Then, they will be stored in the refrigerator. I made some last year and the oil that they are packed in is also good to use for other Italian dishes. They are delicious tossed into some fresh, hot pasta.


Serena is going to make some barbecue sauce with the tomatoes we harvested this week.

The Federle tomatoes were very prolific and in a better year we would have had a huge harvest of these. We are hoping that since there are many green ones on there that we will be able to get a lot more. The Italian Heirlooms are nice, big tomatoes and have a wonderful flavor but they are not as prolific as the Federles.


The sunflowers are getting a bit bigger and it'll be interesting to see if the seeds mature. The bees were out in full force today landing on many of the flowers. We are leaving the squash to continue growing in the hopes that they will get bigger. This week we had humid weather in the 70's so they are still growing.

An Addictive Pie


Last weekend we celebrated my brother Stuart's birthday. He is a non-traditionalist and doesn't really like cake and loves things with custard in them so I decided to try this pie recipe out that I found in my Bon Apetit magazine a month or two ago. I had heard of this pie from my husband Paul who saw it online as part of a Martha Stewart Show segment. This pie is a customer favorite at Momofuko Milk Bar in NYC. Apparently it is so addicting that it is called "crack pie." I can agree with this assessment however it is very, very rich so I can see having it maybe 1-2 times a year for a special occasion.

It is much like a pecan pie without the nuts and with a cookie crust.

I really, really enjoyed this pie along with my family and can imagine it with other cookie crust flavors including coconut and chocolate crusts. The only thing that turned out differently with my pie is that I didn't have time to let it set up overnight in the fridge so it was a bit runny- but that made it all the more rich and yummy! Enjoy!

Ooey Gooey Rich Pie- or Crack Pie: 10-12 small servings

Oat Cookie Crust:

nonstick vegetable oil spray
9 tablespoons unsalted butter, room temperature, divided
5 1/2 tablespoons golden brown sugar, divided
2 tablespoons sugar
1 large egg
1/4 cup + 2 tablespoons old fashioned oats
1/2 cup all purpose flour
1/8 teaspoon baking powder
1/8 teaspoon baking soda
1/4 teaspoon salt

Pie Filling:

3/4 cup sugar
1/2 cup golden brown sugar
1 tablespoon nonfat dry milk powder
1/4 teaspoon salt
1/2 cup unsalted butter, melted, cooled slightly
6 1/2 tablespoons heavy whipping cream
4 large egg yolks
1 teaspoon vanilla extract

powdered sugar for dusting

Oat Cookie Crust:

Preheat oven to 350F. Line a 13x9x2 inch baking pan with parchment paper and then spray with nonstick spray. (I didn't have the metal pan that the recipe called for so I used a glass one). Combine 6 tablespoons butter, 4 tablespoons brown sugar and 2 tablespoons sugar in a medium bowl. Using an electric mixer, beat mixture until light and fluffy, scraping down the sides of the bowl from time to time- about 2 minutes. Then, add the egg and beat until pale and fluffy. Ad the oats, flour, baking powder, baking soda and salt and beat until the mixture is well blended- about 1 minute. Turn oat mixture into the prepared pan. I found that the mixture is very sticky- so spread it out into the pan so it is as flat as possible, but you may not be able to get it to the edges. Bake until it is golden brown on top- about 17 to 18 minutes. Cool the mixture completely on a wire rack. I ended up putting the pan in the freezer for a few minutes to cool it down because I was running short on time and need to finish up the recipe.

Crumble the oat cookie mixture into a large bowl; add 3 tablespoons butter and 1 1/2 tablespoons brown sugar. Rub the mixture together with your fingers until it sticks together. Transfer this mixture into a 9 inch pie dish. Press mixture evenly into the bottom and up the sides of the dish. Place the dish on a rimmed baking sheet.

Filling:

Put the oven rack into the center of the oven and preheat it to 350F. Whisk together both sugars, milk powder, and salt in a medium bowl. Add the melted butter and blend together. Add cream, then egg yolks and vanilla- mix until well blended. Pour the filling mixture into the pie crust. Bake the pie for 30 minutes. Reduce the oven temperature to 325F and bake for another 20 minutes. Watch the pie during this stage because my crust over browned just slightly. It may have only needed to bake 15 minutes. The filling will be set around the edges but move just slightly in the center.

Cool the pie for 2 hours on a wire rack and overnight in the fridge. I didn't have time to cool the pie for so long- so it only cooled in the fridge for around 2 hours so the filling was still runny- but it was really delicious that way too!

Enjoy a slice of this amazing pie! Below is a picture of a slice of it with the runny, caramel filling. It was amazing!

Wednesday, September 22, 2010

Apples Transformed


Last week Adam and I went out to play in the backyard. Adam loves to pick little apples from our dwarf apple tree up off the ground and inspect them. After washing them off he might even take a bite or two! As we were out there I decided to pick the rest of the apples off of the tree-- there were only 5-6 small ones. With these in hand plus a few Gravensteins I'd picked up at the farmer's market I had the makings for a lovely apple crisp.

I had remembered that in a past issue of Cook's Illustrated they had a recipe for apple crisp that looked intriguing. It looked good and was nice because it could all be assembled into a skillet and baked in the oven.

I decided to add a few of my own touches to the recipe- substituting more local hazelnuts for the pecans and adding nutmeg and vanilla to the topping as well as the filling. Also, I used a bit of our own apple cider!

The original recipe calls for Golden Delicious apples- but I combined my unknown variety rosy backyard apples with a few from the market and it turned out divine! So, get creative with your own apples or apples that you find at the market this time of year- just ask the farmer which ones are good for baking and enjoy! This recipe is so good that even my husband who usually doesn't like apple desserts has enjoyed it!


Oregon Apple Crisp:

Makes 6 to 8 servings

Topping:

3/4 cup unbleached all purpose flour
3/4 cup finely chopped hazelnuts
3/4 cup old fashioned rolled oats (I use Bob's Red Mill- another local product)
1/2 cup packed light brown sugar
1/4 cup granulated sugar
1/2 teaspoon cinnamon
1/2 teaspoon nutmeg
1/2 teaspoon salt
8 tablespoons or 1 stick unsalted butter, melted
1 teaspoon vanilla

Filling:

3 pounds Golden Delicious, Gravenstein or other good cooking apple- peeled, cored, halved and cut into 1/2 inch thick wedges
1/4 cup sugar
1/4 teaspoon cinnamon
1/4 teaspoon nutmeg
1 teaspoon vanilla
1 cup apple cider
2 teaspoons lemon juice
2 tablespoons unsalted butter

1. For the Topping: Adjust the oven rack to middle position and heat oven to 450F. Combine flour, hazelnuts, oats, brown sugar, granulated sugar, cinnamon, nutmeg and salt in a medium bowl. Stir in butter and vanilla until mixture is thoroughly moistened and crumbly. Set aside and make the apple filling.

2. For the Filling: Toss apples, granulated sugar, cinnamon and nutmeg together in a large bowl; set aside. Bring apple cider to a simmer in a 12 inch oven safe skillet over medium heat; cook until reduced to 1/2 cup, around 5 minutes. Put the cider into a liquid measuring cup, stir in the lemon juice and set aside.

3. Heat the butter in the same skillet over medium heat. When the foaming starts going down add the apple mixture and cook, stirring frequently until apples begin to soften- 12 to 14 minutes. You don't want to fully cook apples. Remove pan from the heat and stir in cider mixture to coat the apples.

4. Sprinkle the topping evenly over the apple mixture- breaking up any large chunks. Place skillet onto a baking sheet and bake until the apples are tender and the topping is golden brown, 15 to 20 minutes. Cool on a wire rack around 15 minutes- then serve.

Enjoy!


Monday, September 20, 2010

Small Victories


Today Trista and I went out to the garden, the first time we had since last week. In fact, on Thursday of last week, September 16, I picked some lettuce to take to the beach, and that was it. The last picking before that was on Monday of that week. The weather has been difficult, which goes with the rest of the season. It was muggy and wet, and around 70 degrees. This week it will continue to be wet and even foggy, and in the 60s for highs, and 40s for low. As you know from your own experience, not much growth can be expected with weather like that.


We were pleasantly surprised to find our first zucchini (pictured above on a pile of our beans), and another small one beside it. Usually by this time we are heartily tired of that vegetable, but we count it as a small victory for this difficult season. Trista began lifting the cucumber vines, and we noticed many tiny "beginner" cukes, and a few that were pickling size. Another small victory.


Our purple-striped wax beans had a decent crop, and we noticed a few blooms still on them. So, victory number three. We're on a roll!

Next we noticed our tomatoes. Hooray! Our pet tomato, the purple calabash, had a beauty ready to pick. The Federle tomato finally gave us some partially ripe ones. The Italian Heirloom and Jaune Flamme also gave up some partially ripe tomatoes.


Next, on to the green snap beans. Yay! we have enough for each of us for dinner tonight. A tiny victory indeed.

Winter squash were surveyed, and found, well, small. For this year, that will have to count for a victory.
Two more small victories - sunflowers and grapes. The grapes are miniscule but ripening nicely, just enough for eating fresh. This is the first year, so we are okay with that. The sunflowers are blooming and pretty, but small. Enough for a bouquet, but probably no seeds, or very few anyway.
While harvesting, we talked about our expectations at the beginning of this season, and compared the harvest to last year. On both counts we came up short. At nearly 500 pounds of tomatoes on half as many plants last year, we don't think we'll get anywhere close this year. in 2009, beans were plentiful and corn grew well so we were able to freeze a lot. Cucumbers also gave us enough to make about 40 pints last year of pickles and 5 quarts of relish. The picture of the tiny pile of veggies below was our harvest for today....


This year we can count 12 pints of pickles on the shelf, and about 1 1/2 gallons of frozen wax beans. Tomatoes and green beans have only produced enough to have for fresh so far, but we should get enough to can some tomatoes, and freeze some beans.

The peppers, brussels sprouts, cabbage, broccoli, and cauliflower are - as Trista says - a big pile of nothing. We'll be able to harvest beets, carrots, basil, and dry beans , though, so still some victory there. Also, potatoes produced less than expected, but we are not disappointed - it is our first effort, and we'll do better next time even if the weather conditions are as bad.

Trista had some news to share about her suburban garden, which fared a bit better. She does have Halloween pumpkins ready to be carved in time for that holiday. She had lots of rhubarb, and was able to put about half a gallon of chopped rhubarb in her freezer. Strawberries produced all season, enough to keep Adam happy finding and eating them. She also harvested some unexpected and delicious huckleberries. Trista also had some apples from her young apple tree, and combined them with a couple of apples from the farmer's market for an apple crisp.

The sweet potatoes didn't even put out a vine, and may join the above-mentioned "big pile of nothing" vegetables. We haven't dug them up to see yet, but you'll be the first to know. Her "mystery" volunteer squash may turn out to be a white pumpkin. It is round and very white, so we shall see. It is, at least, providing some entertainment, something the rest of our efforts is sorely lacking.

All the time during our disappointing harvest, we have been discussing what we might do to be successful next year. To be sure, we may not have the same difficult weather, but then again, we might. We decided to plan for the worst and hope for the best. So, we're looking for short-season tomatoes, investigating ways to make all of those "big pile of nothing" crops do better, and figuring out ways to increase the warmth of our soil for all of our crops. One idea I saw was to dig a deep trench or bed, lay in some fresh manure and cover it with soil, then plant seeds. The fresh manure will warm the soil and the seeds, so they will germinate and grow better, then as the manure decomposes, the plant's roots will have grown enough to tap into the rich nutrients it provides at that stage. It sounds good anyway, so if we can figure out how to get some fresh manure we just might do it. We are looking for other ideas too. Do you have any for us? We're listening!

Saturday, September 4, 2010

Chocolate Birthday Bliss!


For my son Adam's 2nd birthday as always I wanted to make a cake from scratch. I wanted it to be delicious and fun for him and for all of the party guests. This cake fit the bill very well. I actually made this cake last year for his first birthday in a much smaller version just for him and made other cakes for the guests. This year, I wanted to make a larger scale version of this rich, moist, chocolate cake.


I had searched a long time for the definitive chocolate cake recipe and this is it! I found it last year online when I was searching for recipes for Adam's birthday. He seemed to really love the cake. I feel like I never really need another chocolate cake recipe-- I can always dress this one up or down to suit the occasion.

Adam has loved clocks for a long time. One of his first words was "clock" and he loved pointing them out everywhere we went. He still loves to play with a few pocket watches we have in his toy box. They are some that his Grandpa had collected long ago. He loves to listen to the "tick-tick". So, because Adam loves clocks I wanted his birthday cake to be a clock and I am so happy with the results!


I am so thankful for my sister in law Kim- we make a great cake team because I love baking the cakes and she loves doing the icing and decorating. So, that is exactly what we did. A few days before the party I made the cakes, wrapped and froze them. Then, the day before the party Kim came to make the chocolate buttercream- which is heavenly- and decorated the cakes. She makes magic with frosting and I couldn't be happier! And neither could Adam, who thoroughly enjoyed the cake as you can see below...


Here is the cake recipe- this recipe makes an 8 inch two layer cake or a 10 inch bundt cake. I tripled the recipe for the 12 inch birthday cake. Enjoy!

Rich Chocolate Birthday Cake:

Makes: Two 8 inch layers or One 10 inch bundt cake

Dry ingredients:

2 cups granulated sugar (I used organic sugar)
1 3/4 cups unbleached all purpose flour
3/4 cup unsweetened cocoa powder
1 1/2 teaspoons baking powder
1 1/2 teaspoons baking soda
1 teaspoon salt
Liquid ingredients:

2 large free range organic eggs
1 cup whole milk
1/2 cup canola oil
2 teaspoons vanilla extract
1 cup boiling water

-parchment paper


1. Preheat oven to 350F. Grease and flour cake pans. Then, fit a round piece of parchment paper into the bottom of the cake pans if making the two 8 inch layers.

2. Combine all of the dry ingredients in a large bowl of an electric mixer or mix them in a large bowl with a whisk.

3. Mix all of the liquid ingredients together except the boiling water in a separate bowl.

4. Add the liquid ingredients to the dry ingredients and beat on medium speed for 2 minutes or use a small hand mixer or your whisk to beat until thoroughly combined and smooth.

5. Stir in the boiling water. Pour batter into two 8 inch prepared pans or one 10 inch prepared bundt pan and bake in a preheated oven for 50 to 55 minutes or slightly less for the two 8 inch pans. Be sure to insert a toothpick into the center of the cake and if it comes out clean the cake is done. Let the cake or cake layers cool in the pans for 10 minutes, then invert onto a cooling rack and let cool completely.

6. Make chocolate butter cream (with the recipe below) and fill and frost cake. Decorate with candies if desired!

Quick Chocolate Buttercream Frosting

3 cups confectioners' sugar
1 cup butter
1 teaspoon vanilla extract
1 to 2 tablespoons heavy whipping cream or whole milk
2-4 ounces of unsweetened baking chocolate, melted- I usually use Baker's brand but feel free to use any dark chocolate that you like.

1. In a standing mixer fitted with a whisk, mix together sugar and butter. Mix on low speed until well blended and then increase speed to medium and beat for another 3 minutes.

2. Add vanilla and cream (or milk) and continue to beat on medium speed for 1 minute more, adding more cream (or milk) if needed for spreading consistency.

3. Then, add the melted chocolate. Taste after mixing and make sure that the chocolate flavor is to your liking. If the chocolate flavor is too weak, add more chocolate. Make sure to use a rubber spatula to scrape up the frosting from the bottom and assure that it is thoroughly mixed in.


Enjoy your special and delicious cake!

Friday, September 3, 2010

Garden Updates


We are realizing that when we started this gardening project we had high hopes of large yields of many vegetables and also many fruits from the orchard. Since last year was such a good one in both areas we thought we could plant even more varieties and types of plants and thus get much more to store away for winter. Well, it is not panning out very well because many plants are not producing very much- probably enough to enjoy for a couple of dinners or so, but not enough to can & freeze.


We still hold out hope for our very large tomato patch which is mostly green (as you can see in but the tomatoes are starting to get an orange tinge to them. Normally this time of year we'd be gearing up for canning season and we would be starting to harvest many tomatoes and other crops, but aside from my Mom making a few pickles from our cucumbers we haven't even gotten started because there really isn't much to harvest.


On Wednesday of this week- September1st, 2010 Adam and I headed out to my parent's house to take a look at the garden. We saw our "prized" and only little melon which we will surely enjoy when it is time to pick it!


We also took a look at our squash and although they are small there are quite a few forming on the vines- so we'll enjoy a few of those later on.

Next week we're going to pick more blackberries now that they are really in season and there are many ripe ones to be had. I already have a bag full in the freezer ready for something tasty this fall. So, I'm hoping to harvest a lot to freeze and maybe make some into syrup.


In spite of a very small harvest on most of our crops this year there was a very welcome surprise today! We discovered that there were many hazelnuts on the ground near the hazelnut trees. Since there is finally a pollinator tree nearby we were able to harvest nearly a whole large bucket of nuts! We will dry them out and shell them soon! Very exciting to see!! You can see in the picture above that the nuts still have a husk on them, it is fun to see them in their "raw form."


The dry bean harvest will be moderate, but they appear to be producing well. It is the first time we have tried to grow dry beans and it will be fun to try the many different kinds. The pole snap beans are loaded with blossoms, but because the crows ate so many of the bean seeds last spring, we won't get the huge crops we hoped for. On the other hand, they at least didn't take all of them! Some of the blossoms are now small beans, so we should be able to have some next week. Keep your fingers crossed!


The only beans we have harvested so far are the purple-striped wax beans. I've only been steaming and freezing them, as my purpose in growing them is to use them in three bean salad. As I mentioned, the green snap beans are just about ready, so now we are hoping for the limas, or at least the scarlet runners for our third bean.

As Trista said, I have been making pickles recently. Since the harvests are small, I just adjust the recipe to fit the quantity I have, and keep on going. I like to make 14-day sweet pickles, and I have been making dill pickles from the same recipe for many years now. I have tried other recipes for each, but I keep coming back to my old standbys. The 14-day sweet pickle recipe is from an old Kerr canning jar booklet and is similar to other recipes using a long cure. The dill recipe is one I cut from the Oregonian many years ago,Mrs. Neusihin's. She made and sold pickles in the Portland area for many years. Her establishment was close to my school, and she delighted in handing out pickles to passing students. It was a tiny business, to be sure, but she was famous in the area for her dills. You can easily find similar Kosher Dill recipes in canning books, but I use hers, as it brings back happy memories of the delighted kindness of an old lady to those of us who greeted her and enjoyed her pickles. Below you can see Adam sure enjoys these pickles too....

Here is the recipe for those yummy pickles:

Mrs. Neusihin's Pickles:

Makes: 8 of pickles jars

8 cucumbers, per jar approximately
2 cloves garlic, per jar
1 hot red pepper, per jar
1/4 teaspoon dry mustard, per jar
1/2 teaspoon pickling spice, per jar
2 teaspoons prepared horseradish, per jar
2 teaspoons dill, per jar
1 cup salt, noniodized
24 cups water
8 grape leaves

Fill jars with cucumbers, make sure to prick the blossom end with a toothpick first. Put everything but the salt and water in the jars in quantity shown per jar. Boil the water and salt to make a brine. Make sure the salt is dissolved, then pour boiling hot over cucumbers and spices. Put a grape leaf in each jar and then put on lid, but do not seal tightly for 5 days. During each day, shake jar occasionally. Ready to eat in 4 to 6 weeks.

Enjoy!

Onto other gardening news....

Difficulties arising from the weather continue. Today the temperature is in the high 80s, but earlier in the week it was in the low 60s. I liken the weather ups and downs to an erratic driver on the road, making it difficult for fellow travelers to decide what to do to keep safe. I know the tomatoes and other plants like more warmth, and that cooling down the earth and cutting down the sunshine just aren't compatible with the growing season.


We have decided through this difficult weather that we have to look about us for other possibilities to harvest, and as Trista mentioned, the blackberries are looking good to us. We also made some cider from some tiny Lady Apples, on a tree of our neighbor. The deer got to the tree first, so we shared with them and had just enough to make spiced cider at Christmas. The Lady Apple is sweet, and slightly pink inside, so the cider is a rosy color, and a cinnamon stick or two is probably all that will be needed. I think our appreciation of this treat will be all the sweeter as we look back on our harvest year.

Tiny Suburban Garden Report:

The mystery squash continues to grow quite nicely and is now forming some type of squash and has many blossoms! It is great to see such a great volunteer plant. The few volunteer tomato plants are also doing well and forming little tomatoes! So exciting! We might have a few things here after all. Our four large pumpkins are also doing well on the vines, they'll be ready for Halloween!


Stay tuned for more harvest news...


Just as I was adding the photos to this post my Mom who was visiting us and helping take care of Adam as my Dad finished up our roof project said "Quick, get your camera!" Adam had found a large bunch of huckleberries on the two little bushes we have in our backyard!! What a lovely discovery! I didn't know that there were many berries on them at all! You never know...and they were delicious! Adam had fun picking one and then putting it in his little container, then eating it right away!!

Tuesday, August 31, 2010

Chicken- Two Ways Plus More!

Last week we had a very busy week working on replacing our roof. My husband Paul and my Dad Dale worked on the roofing project all week while my Mom and I helped clean up the old roofing debris, ran errands, took care of my son Adam and cooked meals.

One of the meals we cooked was beer can chicken along with a salad of lettuce and potatoes- both from our garden! Since this year has not been the best for our garden it was nice to harvest a bit and enjoy it last week!


Above are the potatoes that we harvested, boiled and served with a bit of butter, salt and pepper.

I have made beer can chicken before on the barbecue and it was good, but this one turned out particularly tasty! And, as a bonus we made a lovely chicken salad out of the leftover chicken for lunch the next day. It was great to have plenty of hearty and healthy food for a hungry roofing crew!

The recipes for the Beer Can Chicken and Condiment Chicken Salad that we made follow along with my notes. Tonight I am making a chicken soup out of the chicken stock I made from the bones and bits of leftover chicken from these two meals. So, we got 2 meals out of 1 large chicken plus a bit more!! I'll post that recipe later. In the meantime, enjoy these two meals!

Beer Can Chicken:

1 large chicken- 6+ pounds
5-6 tablespoons spice rub ( I used a spice mix I already had and added a bit of brown sugar to it)
1 large & tall can of beer

1. Wash chicken with cold water and blot dry with paper towels.

2. Rub chicken with3-4 tablespoons spice rub outside and inside the cavity. Make sure to take out the giblets or giblet packet.

3. Open the tall beer can and also poke a few holes in the top using a bottle opener. Pour out the first inch or so of beer. Spoon the remaining spice rub into the can of beer. It will foam a bit.

4. Place the chicken onto the can of beer and make sure it can stand upright.

5. Heat your barbecue to high heat at first. Place the chicken on a roasting pan as seen in the picture above. Make sure that you can close the lid of the barbecue over the chicken. Reduce the heat to medium or low. Check your chicken often and lower the temperature if the skin is burning quite a bit.

6. Cook the chicken for an hour + or until the internal temperature reaches around 181F.

Slice, serve and enjoy!


Chicken Salad for Lunch:


The next day we had this lovely chicken salad for lunch! It is a recipe that has been in my family for a long time. We have always served it for summer barbecues or special occasions in the summer months. I love it because it is simple to make yet very special for company. We have reduced the amount of mayonnaise in our version from the original because it seemed to be too heavy. However, you may add more to your taste.

Here is the recipe:

Condiment Chicken Salad:

1/2 cup + of mayonnaise
1 cup raisins
1 cup salted peanuts
1 cup mango chutney (my Mom often uses the kind she makes herself)
1 cup flaked coconut
2 pounds cooked chicken, diced coarsely
1 cups bananas- sliced
1/2 teaspoon salt
2 avocados, sliced
1 banana sliced
6 romaine lettuce leaves
1 tablespoon lemon juice

Mix together mayonnaise, raisins, peanuts, chutney, coconut, chicken and salt. If making ahead, cover and chill at this point. Just before serving, gently combine with the two cups sliced bananas. Line the salad bowl (or put on a plate) with lettuce leaves and mound salad on top. Garnish with slices of avocado (or you can mix those in as we did above) and banana that have been dipped in lemon juice.


Enjoy these two meals from one chicken!

Monday, August 30, 2010

Burgers All Dressed Up

Since Labor Day is coming up and it is a popular time to have a barbecue and get together with family and friends- it is a good time for this burger recipe that has been a family favorite for a long time!

I actually served these fancy burgers for my Dad's birthday earlier in August this year, but since I have been busy with many projects- including helping out with roofing our house (doing the clean up, etc.) I am finally getting around to posting this!

We served this meal using the freshest, most local and in season ingredients we could find- from local grass fed beef, heirloom tomatoes, green onions, parsley, sweet corn and sourdough french bread loaves from our farmer's market to the fresh eggs used in the deviled eggs from my parent's chickens as well as a local blue cheese! Our favorite is the Caveman from Rogue Creamery. It was a summer meal at its best!!

These burgers are so special, yet so easy!

Here's the recipe that serves 6 people:

Noveau Riche Hamburgers:

2 pounds of grass fed ground beef
1/8 cup chopped parsely
1/4 cup chopped green onions
1/2 tablespoon salt
1/8 teaspoon pepper
1 cup red wine
4-5 ounces crumbled blue cheese

2-3 sourdough French baguettes

Optional Toppings:

-tomatoes
-lettuce
-ketchup
-mustard
-relish
-caramelized sweet onions

Mix together meat, parsley, onion, salt and pepper. Divide into 6 third-pound patties, making a depression in the center of each one. Place in a shallow pan and pour wine over patties, pouring into the depressions. Chill 2 hours or longer.


Remove patties from marinade and grill over medium hot coals on a charcoal grill to taste (8-10 minutes for medium rare) or over a gas grill to taste. When the burgers are almost done cooking- put the crumbled blue cheese on top of the patty and let it melt a bit.

Serve the burgers on sliced French bread loaves and serve with condiments as desired.


Enjoy your burgers!