Tuesday, July 27, 2010

Raising Raisin Bread


This week's bread was inspired by a photo I saw in a bread book I got last week at a thrift store with my Mom. She found this wonderful British bread book for me while I was watching Adam in the appliance section of the store. The book is called "The Color Book of Home Baking" edited by Hilary Walden. It is an old book from 1978 and it is the kind of old cook book that I truly love! It has photos that really inspire you to bake the breads and try new methods of baking.

I was really in the mood for a bread that would make lovely morning toast and the picture of this bread really made me want to make it. Of course, I had to change the recipe I slight bit as always but I am happy with the end result- the loaf above. The recipe made 2 loaves and they rose very high in the oven. Below is a picture of my baker's apprentice- Adam- my son who loves to sift flour and put it in a bowl, dump it out, taste the dough, etc. It is great fun and such a joy!


The original recipe called for whole wheat flour and rye flour but I used unbleached white flour in place of the rye since I didn't have any and I don't really like the taste of rye unless it is for a deli type sandwich.

Also, the original recipe called for simmering the raisins in white wine, but I had some coffee liqueur that my mom gave me leftover from our Farmer's Tea baking business days and I thought that the raisins would taste really good simmered in that.

Here is the recipe & my notes on what happened and what I might do differently next time.

Whole Wheat Raisin Bread

Makes-2 small loaves- tall but narrow

2 cups raisins
6 tablespoons coffee liqueur + 3 tablespoons extra for mixing with the yeast
3 tablespoons yeast
2 cups warm milk
3/4 cup melted butter
1/4 cup molasses
1 cup light brown sugar
4 cups whole wheat flour
4 cups unbleached all purpose flour
1 1/2 teaspoons salt

1. Simmer the raisins in the coffee liqueur on low for 20 minutes.

2. Mix the yeast with the 3 tablespoons of liqueur in a small bowl.

3. Pour the milk and butter over the molasses in a separate bowl and mix thoroughly. Stir in the brown sugar.

4. Mix the flours and the salt in a large bowl separately. Make a well or hole in the center and add the yeast, milk mixture and raisins. With a spatula mix the flours and the liquid until the dough comes away cleanly from the sides of the bowl.

5. Turn onto a floured board and knead for 8-10 minutes by hand until the dough is elastic and smooth. Put the dough into a clean, oiled bowl and cover with a damp kitchen towel. Leave to rise in a warm place until doubled in bulk- about 2 hours.

6. After this first rising, knead the dough about 3-4 minutes then divide the dough into 2 parts. Form 2 loaves and place them into oiled small loaf pans. Make sure to oil the tops of the loaves. Then, place them in a large plastic bag (I used an "oven bag" used for cooking roasts). Set these aside for 30-40 minutes to rise a while.

7. Bake at 475F for around 9-10 minutes, then lower the temperature to 425F and bake for 30-40 minutes. After lowering the temperature put foil on top of the bread so that it does not brown so much. I did not do this but I recommend it because the bread browned a bit more than I'd like even though the inside is very tender.

8. Turn out onto a wire rack to cool.

This bread is heavenly as toast. One of my loaves has a hole in the middle of it and it is very tender in the center, but it makes fabulous toast! See the picture below of a slice of the bread. I love it!! Enjoy!

Friday, July 23, 2010

Boys 'N Berries


Today we worked more on weeding and watering in the garden this afternoon. It was fairly cool in the morning- in the 60's but it sure warmed up in the afternoon. Since Adam takes a nap in the afternoon this is the time that we have to do most of our gardening work, so we have to work in the hot sun.


In the morning we picked quite a few boysenberries much to Adam's delight. He loved picking a lot of his own berries. Sometimes he would pick one that wasn't very ripe and take a bite or two and then ask me to "hold this." So cute! He sure loves berries! We also picked a few of the snap peas still on the vines.


Later in the afternoon we went out to work in the garden and I noticed the echinacea was blooming in one corner of the garden. It looks so pretty!


Our grapes (pictured above) are also doing quite well and are getting much bigger. We also saw some lettuce and beets (pictured below) growing quite nicely.


We went to work weeding two rows of carrots. This was hard work because the carrot plants are so tiny and delicate and it was hard to spot them among the grasses and weeds that were much bigger. But, we were able to uncover many carrots. Also, we worked on weeding the rows of beans. We haven't gotten the bean poles up yet but we noticed that the beans are starting to put out tendrils and wanting to climb up something so that is a project we need to tackle soon.


My Mom also watered all of the plants. Right now we just have hoses out there so it is a big job to water everything so maybe next year we'll put in some type of drip irrigation system in. While my Mom was watering the potatoes she noticed a potato sticking out of the ground! It was such a great discovery! We were very excited but then quickly covered it up so that it could grow some more. We have decided to harvest our potatoes at the very end of the season so that they have more time to grow.

Since our melon plants are so small right now we have doubts that we will get any melons this season. Our corn is still very spotty but there are a few more stalks that have come up in some areas so we made sure to water them in case there is a small chance of getting a few ears of corn.

Have a great week and enjoy the sunshine!

Wednesday, July 21, 2010

Peachy Keen!

This week's bread was inspired by the local fruit now in season...peaches! I love peaches and since they are only around for a short time each summer I wanted to feature them in a bread. I was able to get some small, sweet peaches at the Beaverton Farmer's Market last Saturday so on Monday they were ripe and ready to use in the bread pictured above.

Since I had a lot of luck making the classic whole wheat Tassajara bread I decided to try the egg variation. I followed the basic recipe but I added a bit of whole wheat flour and whole milk to it. This bread braid turned out to be so pretty and so delicious that even my son Adam who usually doesn't each much bread has been eating "peach bread" all week! 'Below is the recipe and my notes and photos of the process.

Whole Wheat Egg Bread- Peach Braid & Loaf:

Makes: 1 large peach braid loaf and 1 regular loaf of sandwich/toasting bread

I. Sponge:

2 1/2 cups whole milk
3 tablespoons yeast
1/4 cup brown sugar
2 eggs beaten
2 cups unbleached white flour (I used a whole wheat white flour)
2 cups whole wheat flour

II: Bread:

4 teaspoons salt
1/3 cup softened butter
2 cups unbleached white flour
1-2 cups whole wheat flour

For the Peach Braid:

2 cups peeled and sliced peaches
1/2 cup brown sugar
1-2 teaspoons ground cinnamon


Directions:

1. Put milk into a glass measure. Microwave for about 1 minute to warm it up. Pour this mixture into a large bowl and dissolve the yeast in it. Stir in the brown sugar. Then, stir in the beaten eggs.

2. Then, stir in the unbleached white flour and the whole wheat flour. This will make a very thick batter. Stir the mixture with a spoon about 100 strokes.

3. Let the sponge rise about 45 minutes. Then, fold in the salt and butter. Do this very gently and carefully. Fold in the additional 3 cups of flour. Add in up to 1 cup more of flour during the kneading process.

4. Knead on a lightly floured board, use more flour as needed to keep the dough from sticking to the board. Knead for 5-10 minutes until the dough is smooth.

5. Let the dough rise about 1 hour or until doubled in bulk then punch it down.

6. Let the dough rise again for another hour.

7. Divide the dough in half. Shape the dough into1 loaf and place it into a small oiled loaf pan.

8. Take the other half of the dough and make a large rectangle as shown in the picture below. Take a bench scraper or butter knife and score the dough into 3 sections.

9. In the middle third of the dough place the peach sections. Then, sprinkle the brown sugar and cinnamon over the peaches.


10. On either side of the middle third make diagonal cuts in the dough about every 2 inches or so.

11. Fold the strips over the peaches alternating sides. Pinch the ends to seal. Slide the braid onto a baking sheet covered in cornmeal.

12. Let the loaves and peach braid rise for another 25 minutes while you are heating up the oven to 350F.

13. Slash the loaf with a sharp knife and then brush both the peach braid and loaf with an egg wash made from 1 egg and 1-2 tablespoons of water mixed thoroughly.

14. Place the peach braid on the bottom rack of the oven with a drip pan underneath to catch any fruit juices that leak out. Bake the loaf of bread on the top rack. Bake the loaf and peach braid in a 350F oven for 1 hour, or until golden brown.

15. Remove from pans and let cool. Below is a close up of the yummy peaches in the bread:


Enjoy!!

Friday, July 16, 2010

Weeding, weeding


Today was a fairly warm but mild day so we were able to work quite a bit in the garden doing lots of weeding, or getting our plants "out of purgatory" as my Mom, Serena likes to say. We have a very healthy cucumber plant in our garden which is pictured above!

In the morning Adam enjoyed coming into the garden to pick as many berries as he could. He picked a couple of boysenberries which are plentiful and almost ripe, but still a bit tart. He picked and ate the last of the remaining raspberries as well as a small handful of blueberries.

Maybe Next Year:

As we were weeding we thought that the red Russian kale and our dragon's tongue wax beans never came up. However, as I edit this post on Monday, July 19th my Mom has discovered that they had come up! A real disappointment was that only a few of our corn plants came up. It will be a miracle if we even get one ear of corn under these circumstances. Also, we only got one of each kind of melon to survive. We'll have to see how the weather is next year and perhaps try some other strategies to grow things.

On another sad note, the bees in the hive that we had near the garden have died. They had done a lot of work on building the honeycomb and preparing the hive for honey but we speculate that the queen may have died and the hive couldn't continue. We'll try again next year.

Blooms:


Many plants in our garden are blooming which is very encouraging! Another row of potatoes is blooming. Our tomato plants look very healthy and green and have many blooms on them. Also, our cucumbers, zucchini and pepper plants are also starting to bloom. This is a very good sign and tells us that crops are on their way!

My Mom fertilized many of the plants this week including the brussels sprouts, cabbage and broccoli. All of these plants are getting much bigger now that we have weeded around them. They grew a lot in one week because they had a lot more room to grow. Also, my Mom staked all of the tomato plants.

This coming week we need to put the poles up for the pole beans that we planted to make sure they have something to grow on. We'll also continue to weed as much as we can and get the garden cleaned up.

Suburban Garden Report:


Our sharecropper pumpkin plant has really taken off! It has runners going in every direction and has several baby pumpkins on it already. The sweet potatoes planted next to it are also doing well. I have been careful not to water them too much unless it has been particularly hot.


The strawberries are starting to produce a new crop of berries and they are growing quite large. Also, the rhubarb continues to put out new stalks! I am very happy with my tiny garden in the backyard.

Have a great week!

Tuesday, July 13, 2010

Bagels- Two Ways


This week I was in the mood for bagels. They are really my favorite breakfast bread and also make great savory sandwiches, so I decided to make 1 batch of bagels two ways- one sweet and one savory. The picture above shows one of the sweet bagels- a cinnamon raisin Scottish oat one. I decided to try a new recipe and a new method of making bagels and then add my own twist on it. The result was a very soft, chewy bagel with a nice crust on the outside. They are so delicious! It was a big treat to enjoy a freshly made bagel this morning.

I used a recipe that I found on the blog The Fresh Loaf which was adapted from the book The Bread Bakers Apprentice.

Here is my version of the recipe along with my notes.

From this basic recipe I made cinnamon sugar bagels and garlic bagels.

Scottish Oat Bagels- with variations- Adapted from The Bread Bakers Apprentice

Makes: 12-14 bagels (I made 14 bagels with 1 recipe)

Sponge:
1 teaspoon instant yeast
4 cup all purpose flour (the original called for bread flour, but I did not have any)
2 1/2 cups water- warm from the tap

Dough:
1/2 teaspoon instant yeast
2 cups bread flour- or all purpose flour
1 cup Scottish oats
2 3/4 teaspoons salt
2 teaspoons malt powder
OR
1 tablespoon malt syrup, honey, or brown sugar- I used honey

1/2 cup sugar + 2 teaspoons cinnamon for the cinnamon sugar bagels
1 teaspoon garlic powder for the garlic bagels

Finishing touches:
1 tablespoon baking soda for the water
Cornmeal for dusting the pan
Toppings for the bagels such as seeds, salt, onion, or garlic- I did not top my bagels

The Night or Late Afternoon Before:


Stir the yeast into the flour in a large mixing bowl. Add the water and stir until all ingredients are blended. Cover with plastic wrap and allow to rise for two hours. As you can see in the photo above the sponge gets very bubbly.- I let it rise slightly longer than two hours because I wanted to finish eating dinner before I made the dough. I think that any recipe that starts with a sponge is going to turn into a lighter, fluffier, more flavorful bread because it seems like the yeast gets a good head start in rising.

Remove the plastic wrap and stir the additional yeast into the sponge. Add 2 cups of the flour, the 1 cup of Scottish oats, the malt powder or honey and the salt into the bowl and mix until all of the ingredients form a ball. You may need to work in the additional 3/4 cups of flour to make the dough less sticky, either while still mixing in the bowl or while kneading. The dough should be stiffer and drier than normal bread dough, but moist enough that all of the ingredients are well blended.

At this point I divided the dough in half and added 1/2 cup of sugar + 1-2 teaspoons of cinnamon for the cinnamon sugar bagels to one half of the dough. Then, to the other half I added 1 teaspoon of garlic powder to make the garlic bagels.

Knead each half of the dough for about 10 minutes on a floured board.

Right after kneading, divide the dough into a dozen small pieces around 4 1/2 ounces each. I used a kitchen scale to measure out each ball. If you don't have a kitchen scale, try to divide the dough as evenly as possible into 12-14 pieces. Roll each piece into a ball and set it aside. When you have all 12 pieces made, cover them with a damp towel and let them rest for 20 minutes. In the photo below you can see the size of the balls of dough on a tray before resting the dough.


Shaping the bagel is very simple. Punch your thumb through the center of each roll and then rotate the dough, working it so that the bagel is as even in width as possible.

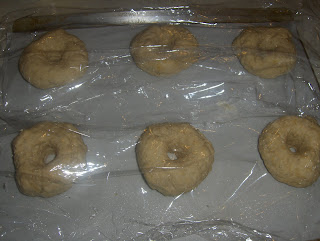
Place the shaped bagels on an oiled sheet pan or pans, with an inch or so of space between one another. If you have parchment paper, line the sheet pan with parchment and spray it lightly with oil or pan spray before placing the bagels on the pan. Cover the pan with plastic wrap and allow the dough to rise for about 20 minutes. My formed bagels are pictured below:


After about 20 minutes of rising time, place the baking sheets in the refrigerator overnight. This will develop the flavor in the bagels.

The Next Morning:

Preheat the oven to 500F. I decided to use the convection feature on my oven- so it was set at 475F. Bring a large pot of water to a boil. Add one tablespoon of baking soda to the pot.

When the pot is boiling, drop a few of the bagels into the pot one at a time and let them boil for a minute. Use a large, slotted spoon or spatula to flip them over and boil them on the other side.

Before removing them from the pot, sprinkle corn meal onto the sheet pan. Remove them one at a time, set them back onto the sheet pan. At this point you can top the bagels with seeds, etc. if you wish while they are still wet. Otherwise you can leave them plain, or brush an egg wash on them.

Place the sheet pan into the preheated oven and bake for 5 minutes. Reduce the heat to 450 degrees, (or 425 in a convection oven) rotate the pan, and bake for another 5 minutes until the bagels begin to brown. Remove the pan from the oven and let cool. I let the bagels bake a total of 15 minutes with a couple of rotations because the temperature was a bit lower and I wanted them to brown a bit more.

Enjoy!

Friday, July 9, 2010

Nuts to Crows


It's been a while since we updated this blog about our gardening. Since then many of our seeds have come up. Overall, our garden is off to a great start, finally!! However, the crows have cleared out a section of sunflowers, corn and beans that were adjacent to each other. That was our second planting of corn, so it looks like we won't have very much corn this year although we are hoping for a third section of corn to come up. It is too early to tell if they have eaten that too!

On the positive side, the tomatoes are starting to bloom so that is very promising. Also, one type of potato is flowering- our blue ones. We noticed some of the areas that were fertilized with the aged chicken manure are way ahead in their growth compared to the ones that have not been fertilized yet. (You can see in the photos below that the top cucumber is much smaller than the bottom one). Many of the rows of beans have come up very well and our squash plants are coming along nicely.


The weeds have really taken over because it rained so long this year that we weren't able to get in there to weed as much as usual. And, now that the weather is fairly hot the roots are hard to dig up. On the other hand, we got out there for a while in the morning and this afternoon to weed and have made a lot of progress. We concentrated on clearing the rows of Brussels sprouts, brocoli and cabbage and we also got the blackberry and thistle plants out before they can go to seed.

Projects this week are to stake the tomatoes and spread the chicken manure to fertilize more of the garden. The chicken fertilizer is decomposing nicely so it won't burn the plants- it is already growing mushrooms in it!


The weather has been pretty hot this week- in the high 80's and 90's here. The boysenberries are looking pretty promising as far as having quite a few berries on them. Their leaves are a bit spotted due to all of the rain we had in May and June. Some of the raspberries got a similar blight although there are some berries on the vines as well. Adam enjoyed picking and eating some of the raspberries as you can see in the photo above!

Quick Suburban Garden Report:

This week has been very, very hot in the suburbs as well. As a result, our garden is doing very well. I have harvest a lot of rhubarb to make pies, so new stalks are growing quickly on the plants. Also, there is a second crop of strawberries coming on to our plants.


The sharecropper pumpkin is doing great! As you can see it has very big blossoms like the one in the photo above. There will be several pumpkins to choose from this Halloween! The sweet potatoes are getting a bit of new growth on them as well and are looking healthy!

Here's to summer!

Thursday, July 8, 2010

Loftier Pursuits


After making a rather dense but delicious loaf of sourdough broiche bread a while back I was in the mood for a lighter whole wheat bread made with yeast. I am also reviving my sourdough starter as it was a bit neglected for a few days. It is springing back to new life as it bubbles in a jar on the counter. Meanwhile....

My Mom has given me several of her bread books and old cookbooks which I am thrilled with. One of these books was the 25th Anniversary Edition of the Tassajara Bread Book by Edward Espe Brown. This book gave me new inspiration for my baking!

Although this might not be the most ideal day for baking because it is in the 90's outside, it is a great day for raising bread dough, so I went for it. I wanted to make one loaf plus a batch of rolls to save for a family dinner this weekend. This worked well and I got two projects done at once!

The result of my baking today was the lovely loaf above. It is one of the prettiest loaves I've ever made. It has a nice crust on the outside that is not too tough and it is nice, soft and light inside! Just what I was after! The rolls (pictured below) are also beautiful and delicious! I can't wait to serve them!


I really enjoyed learning some new techniques and hand work in making bread with this recipe. I changed the recipe a bit from the original but it is close.

Light and Fluffy Whole Wheat Bread: Adapted from the 25th Anniversary Edition of the Tassajara Bread Book

Makes: 2 small loaves in 4x8 pans or 1 small loaf and about 11-12 rolls or about 24 rolls

I. Sponge:

2 cups whole milk
1 cup warm water
3 tablespoons yeast
1/4 cup brown sugar
2 cups unbleached white flour (I used a whole wheat white flour)
2 cups whole wheat flour

II: Bread:

4 teaspoons salt
1/3 cup softened butter
2 cups unbleached white flour
1 cup whole wheat flour


Directions:

1. Put milk and water together in a glass measure. Microwave for about 1 minute to warm the liquid up. Pour this mixture into a large bowl and dissolve the yeast in it. Stir in the brown sugar.

2. Then, stir in the unbleached white flour and the whole wheat flour. This will make a very thick batter. Stir the mixture with a spoon about 100 strokes.

3. Let the sponge rise about 45 minutes. Then, fold in the salt and butter. Do this very gently and carefully. Fold in the additional 3 cups of flour.

4. Knead on a lightly floured board, use more flour as needed to keep the dough from sticking to the board. Knead for 5-10 minutes until the dough is smooth.

5. Let the dough rise about 1 hour or until doubled in bulk then punch it down.

6. Let the dough rise again for another hour. Shape the dough into loaves or rolls and place in pans or on a greased baking sheet sprinkled with cornmeal (if you are doing rolls). Let the loaves or rolls rise for another 25 minutes while you are heating up the oven to 350F.

7. Slash the loaves or rolls with a sharp knife and then brush them with an egg wash made from 1 egg and 1-2 tablespoons of water mixed thoroughly.

8. Bake the loaves in a 350F oven for 1 hour, or until golden brown. If you are baking rolls at the same time bake them for only about 20 minutes, then take them out and let the loaf continue baking.

9. Remove from pans and let cool.

Enjoy!!

Tuesday, July 6, 2010

Stars and Stripes and Blueberry Pie!

Happy 4th of July everyone! It is the time of year to use the summer's bounty of berries to make pie! It is my favorite time of year because I love the 4th of July and I love berries! It is so wonderful to live in a place with such a bounty of summer fruits! I made this blueberry pie for the 4th of July barbecue that my family had and it was as good as always. This is a very simple pie recipe that I got from The Pie and Pastry Bible by Rose Levy Beranbaum. This recipe is such a winner because it so artfully showcases the blueberries just as they are, ripe, juicy and sweet! Enjoy!

Here is the recipe:

Blueberry Pie: Adapted from The Pie and Pastry Bible

Ingredients:

Pie crust for a 9-10 inch pie ( I ended up making a 10 inch pie)

1/2 of a large egg white- beaten

4 cups blueberries- rinsed and dried
1/2 cup water + 2 tablespoons divided
2 tablespoons cornstarch
1/2 cup sugar
1 teaspoon lemon juice
1/2 teaspoon salt


Pie Shell:

Make a pie shell for a 9-10 inch single crust pie ahead and chill in the freezer for at least 1 hour before making your pie. I like to make my pie shells several days ahead so that they are very cold when they go into the oven and thus are more flaky. Also, with some extra dough cut out a few stars and chill them as well.

Line the pie crust with either parchment paper or foil filled with beans or rice. (I keep a pouch of foil filled with rice in my baking drawer for this purpose so that I can reuse it over and over to blind bake my pie crusts when needed. ) Bake at 375F for 20 minutes. Remove the foil or paper with rice or beans. Prick the crust on the bottom with a fork many times. Then, bake it for another 10-15 minutes or until golden brown. Cool the crust for about 3 minutes, then brush the bottom & sides with the egg white.

During the final 10 minutes of baking you may bake your dough stars. Place them on a baking sheet and sprinkle with sugar, then bake about 10 minutes.

Pie Filling:

Measure out 1 cup of blueberries. Place them in a saucepan together with the ½ cup water. Cover & bring them to a boil.

Meanwhile, in a small bowl, whisk together the cornstarch and the remaining 2 tablespoons of water. Set it aside.

When the water and blueberries have come to a boil, lower the heat and simmer, stirring constantly, for 3 to 4 minutes or until the blueberries start to burst and the juices begin to thicken. Stirring constantly add the cornstarch mixture, the sugar, lemon juice, and salt. Simmer for a minute or until the mixture becomes translucent. Immediately remove it from the heat and quickly fold in the remaining 3 cups of blueberries.

Spoon the mixture into the baked pie shell and allow to sit at room temperature for at least 2 hours before serving. When set, the berries will remain very juicy but will not flow out of the crust.

Enjoy this pie and enjoy summer!!