Wednesday, October 12, 2011

The Beauty of Fall

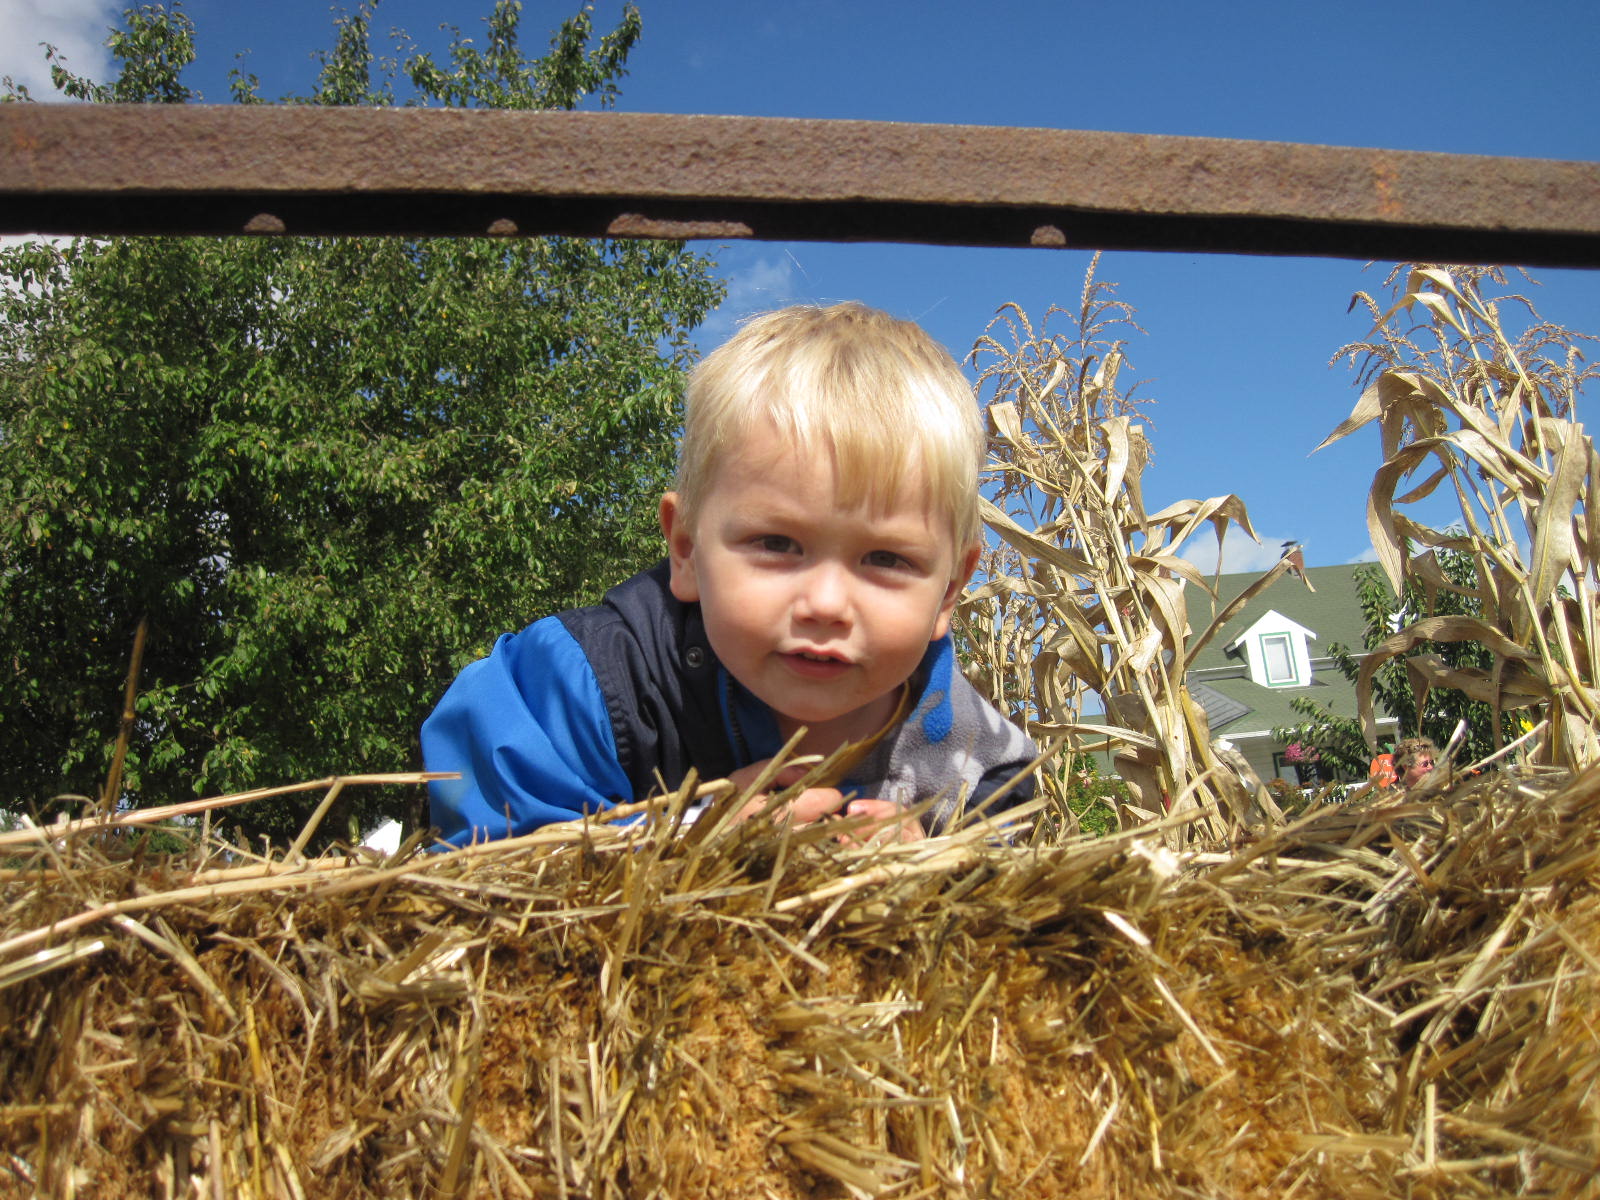
Adam playing on a hay bale at the Plumper Pumpkin Patch.

The days are cooler and things are winding down in the gardens, the leaves are changing color and the mornings are foggy sometimes. Fall is here and we are all enjoying it very much. It brings us inside to enjoy delicious food together more and we love the coziness of fall days. I am happy that we live in a place where we can truly appreciate each season. Although my favorite season is summer because I love growing a garden, enjoying the sun and all of the lovely flowers I like to have a chance to slow down in fall and winter and enjoy the bounty of the harvest.

Suburban Garden:

Although this week I did not really work in the garden and I did not harvest anything either since we are getting busier with work, preschool activities and seasonal things such as making Halloween costumes I did appreciate some of the lovely changing colors happening outside. I love the colors of the leaves and some of the flowers that linger and and change color. There is still a lot of beauty to enjoy outside.

A beautiful purple hydrangea bloom in our front yard.


The beautiful yellow leaves on a tree in our front yard.

The top of the pumpkin that Adam picked out.

Country Garden:

Last Friday we did not visit the country garden because my Dad got sick. It is unfortunate because we missed the plum harvest and seeing many other plants and happenings around the garden and orchard. However, I did talk to my mom and find out about some of the happenings about the place.

My parents harvested a small cantaloupe and watermelon and ate them. They thought that they were nice and ripe and had excellent flavor. They plan to grow more next year and apply more fertilizer and put them in a sunny spot so that they will grow larger.

Also, they plan on harvesting the rest of the corn very soon as well as harvesting more apples to make cider with this coming weekend. My mom dried the plums that they harvested and has continued to can tomatoes and preserve other harvests. It is a very busy time trying to harvest the rest of the bounty from the garden and orchard this time of year!

A Trip to the Pumpkin Patch:

This past weekend we decided to go to a pumpkin patch. We decided to go to Plumper Pumpkin Patch located in Portland on Old Cornelius Pass Road. It was a great choice because there were a lot of activities and Adam had a great time there! He really honed in on a particular pumpkin that he liked as soon as we arrived. He tried to lift it and carry it with him right away! Later on, Paul was able to purchase that same one to take home. We also rode the barrel train which was made of hollowed out plastic barrels fashioned into a train which was pulled by a tractor. It was so much fun and Adam got a huge kick out of it!

Adam by some of the pumpkins he liked at the patch.

Me with Adam at the pumpkin patch.
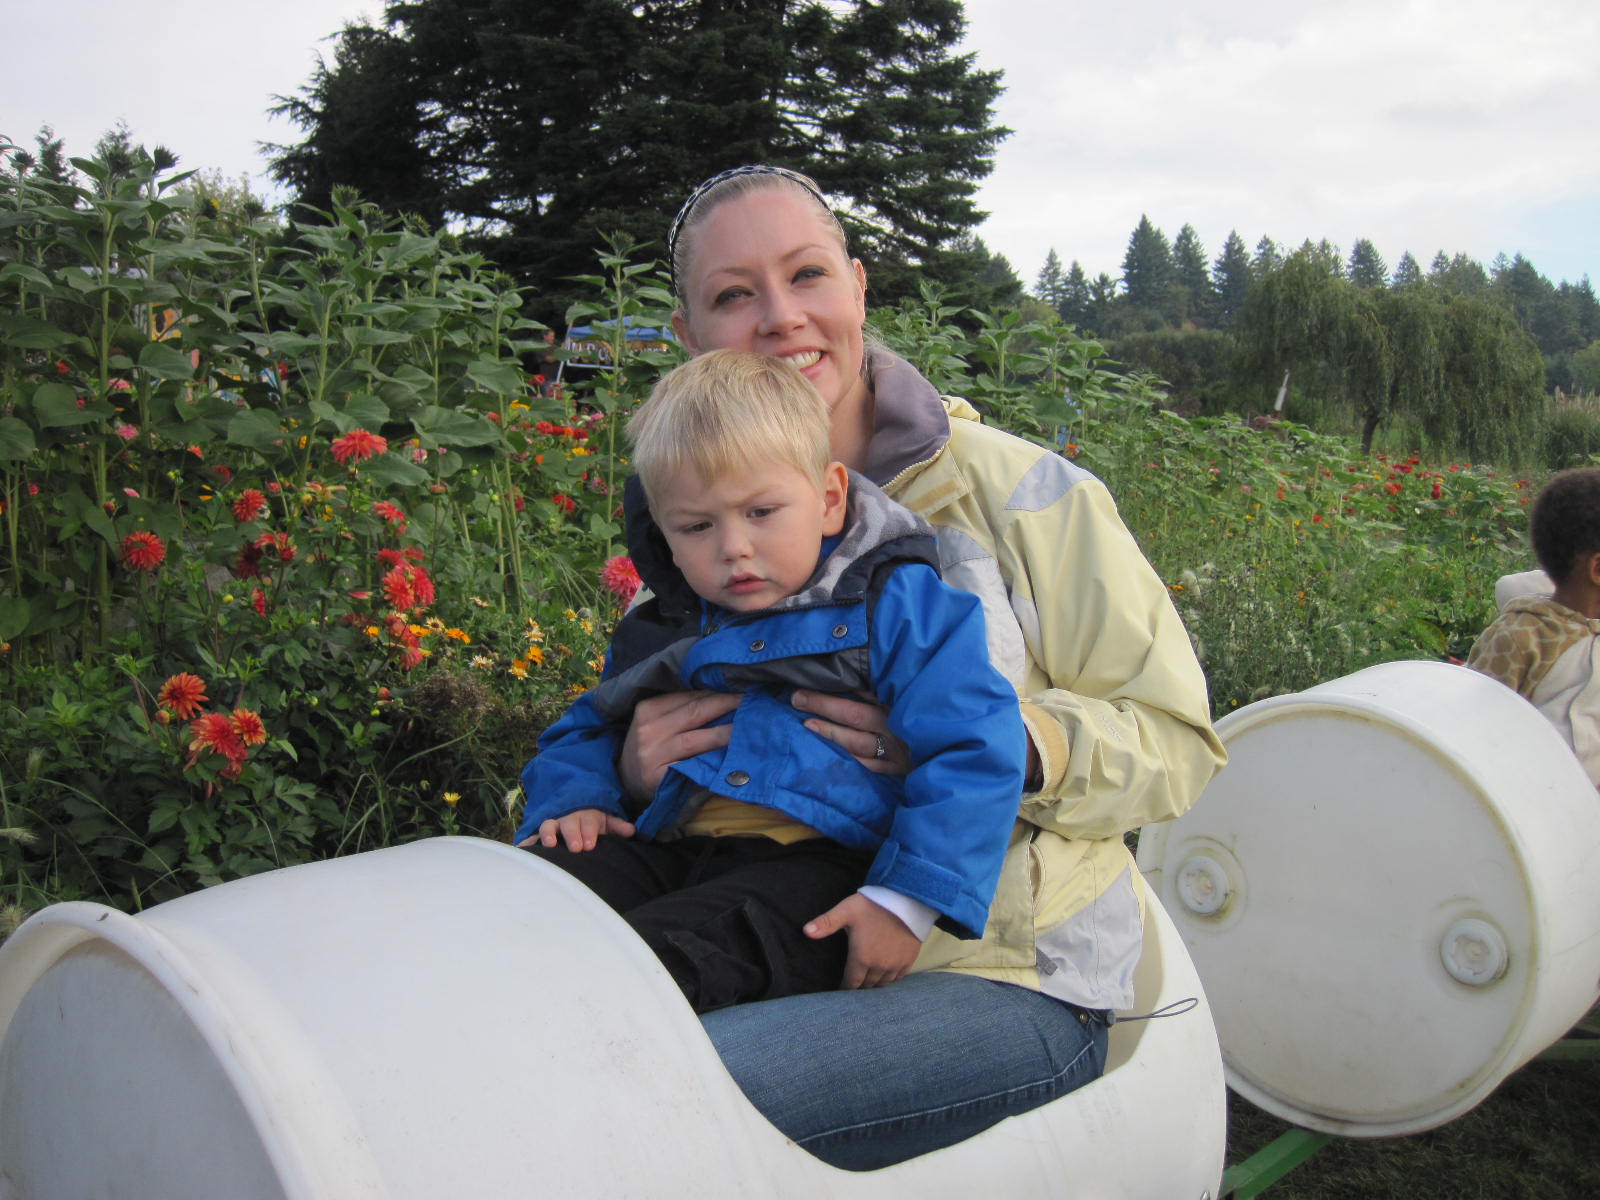
Me with Adam on the barrel train ride!

Adam by some cornstalks. He loved going in and out of his hiding place!

Paul with Adam and the pumpkin he picked out.

Cooking:

This week I made some baked goods out of whole grains, pumpkin and zucchini. I hope you try these recipes too and enjoy them!

Oatmeal Whole Grain Pancakes:

This is a recipe that I cut out of the Oregonian newspaper quite a while ago. It makes very wholesome pancakes that are also delicious! I upped the amount of cinnamon in them though. Also, I used some uncooked whole grain cereal instead of the wheat germ since I didn't have any.


Oatmeal Whole Grain Pancakes!

Ingredients:

1/2 cup old fashioned oatmeal, uncooked
1/2 cup whole wheat flour
2 tablespoons wheat germ or whole grain cereal
2 tablespoons firmly packed light brown sugar
2 teaspoons baking powder
1 teaspoon ground cinnamon
1/4 teaspoon salt
1 egg, lightly beaten
1 cup whole milk, or as needed

1. In a large bowl, whisk together the oatmeal, flour, wheat germ or whole grain cereal, sugar, baking powder, cinnamon and salt. Whisk in the egg and enough milk to just combine the mixture.

2. Heat griddle, skillet or electric frying pan over medium heat (or around 300F on your electric frying pan which I used).

3. Brush the griddle or skillet lightly with butter.

4. When the pan is hot, pour 1/4 cup batter for each pancake. Cook pancakes until small bubbles appear on the surface and the bottoms are golden, about 2 minutes. Flip the pancakes and cook until golden, about 1 minute. Repeat with the remaining batter until all of the pancakes are cooked.

5. Serve the warm pancakes with syrup, butter or jam. Enjoy!


Making Pizza:

On Saturday evening Adam helped me assemble the homemade pizzas. He had a lot of fun spreading the sauce and putting on the toppings such as pepperoni. He is a great pizza chef! We all enjoyed the pizza along with some spinach salad. The recipe for the pizza is the same as the one I used for grilled pizza in the summer in an earlier post.

Adam helping put some pepperoni on the pizza. He loved helping out!

The combination pizza ready to put into the oven.


Spinach Salad:

This is a recipe that I found online. It is like one of those "fancy" salads you get at restaurants. I cut the salad dressing ingredients down enough to make a smaller salad to serve the three of us. However, I included the original version here.

A yummy salad to go with the pizza!

Ingredients

  • 1 tablespoon butter
  • 3/4 cup almonds, blanched and slivered
  • 1 pound spinach, rinsed and torn into bite-size pieces
  • 1 cup dried cranberries
  • 2 tablespoons toasted sesame seeds
  • 1 tablespoon poppy seeds
  • 1/2 cup white sugar
  • 2 teaspoons minced onion
  • 1/4 teaspoon paprika
  • 1/4 cup white wine vinegar
  • 1/4 cup cider vinegar
  • 1/2 cup vegetable oil

Directions

  1. In a medium saucepan, melt butter over medium heat. Cook and stir almonds in butter until lightly toasted. Remove from heat, and let cool.
  2. In a large bowl, combine the spinach with the toasted almonds and cranberries.
  3. In a medium bowl, whisk together the sesame seeds, poppy seeds, sugar, onion, paprika, white wine vinegar, cider vinegar, and vegetable oil. Toss with spinach just before serving.

Pumpkin Pie Bars:

This is a recipe that I found online at Joy of Baking. I love their recipes but I decided to change the recipe just a bit by adding candied ginger to the hazelnut shortbread crust and adding some nutmeg to the filling. I love the flavor of the ginger! It worked very well! I love being able to have a nice small piece of pumpkin pie with a delicious, nutty crust!

Delicious pumpkin pie bars!

Hazelnut Shortbread:

1/2 cup (50 grams) raw unpeeled hazelnuts

1 cup (130 grams) all purpose flour

1/4 teaspoon kosher salt

1/4 cup chopped candied ginger

1/2 cup (113 grams) unsalted butter, room temperature

1/2 cup (110 grams) light brown sugar

>1/2 teaspoon pure vanilla extract

Pumpkin Filling:

2 large eggs

1 - 15 ounce can (425 grams) pure pumpkin (2 cups)

3/4 cup (165 grams) light brown sugar

1/2 teaspoon pure vanilla extract

1 teaspoon ground cinnamon

1/2 teaspoon ground ginger

1/2 teaspoon ground nutmeg

1/8 teaspoon ground cloves

1/4 teaspoon kosher salt

1 1/2 cups (360 ml) heavy cream

Garnish: (optional)

1/2 cup (120 ml) heavy cream

1 tablespoon (15 grams) granulated white sugar


Pumpkin Bars: Preheat oven to 350 degrees F (177 degrees C) and place the rack in the center of the oven. Line the bottom and sides of a lightly buttered 9 x 13 inch (23 x 33 cm) baking pan with a 22 inch (56 cm) long piece of aluminum foil that has been buttered and floured.

Hazelnut Shortbread: Place the hazelnuts on a baking sheet and bake for approximately 15 minutes or until brown and fragrant and the skins are starting to peel. Remove from oven, place the hot hazelnuts in a clean dish towel, roll it up, and let the nuts 'steam' for about five minutes. Then briskly rub the nuts to remove most of their skins. Set aside to let the nuts cool and then coarsely chop.

Place the chopped hazelnuts, flour, candied ginger and salt in the bowl of your food processor fitted with a metal blade. Process the mixture until the hazelnuts are finely ground.

In the bowl of your electric mixer, or with a hand mixer, cream the butter and sugar until light and fluffy (2 - 3 minutes). Beat in the vanilla extract. Add the flour mixture and beat until a soft dough forms. Press the dough evenly and firmly onto the bottom of the foil-lined pan. Bake for about 15 minutes or until the shortbread is set and beginning to brown around the edges. Remove from oven and place on a wire rack.

Pumpkin Filling: Meanwhile, in a large bowl, whisk the eggs. Add the pumpkin, sugar, vanilla extract, spices, and salt and whisk to combine. Gradually stir in the cream. Pour the filling over the pre baked crust and bake for about 30 - 35 minutes, or until the filling is set in the center. Remove from oven and place on a wire rack to cool.

Run a knife around the inside edges of the pan. Lift the pumpkin bars from the pan by holding onto the edges of the aluminum foil. Place on a cutting board, peel back the aluminum foil, and cut into 32 bars. The bars can be covered and refrigerated up to three days. Serve chilled or at room temperature.

Garnish: Whip the cream with the sugar until stiff peaks form. Place the whipped cream in a piping bag fitted with an open star tip and pipe a small rosette of cream on top of each pumpkin bar.

Makes 32 pumpkin bars.

Source: This recipe was originally from the following book:

Rodgers, Rick. Autumn Gatherings. William Morrow. New York: 2008.

Pumpkin Zucchini Bread:

I found this recipe online. I just added dried cranberries instead of the chopped walnuts and also added cardamom and more cinnamon. This is a deliciously moist bread that is so good with soft butter on top!


Pumpkin Zucchini Bread with Cranberries.

Ingredients:

Directions:

  1. Before beginning, preheat your oven to 350 F and grease and flour two loaf pans.
  2. Mix eggs and sugar together, then stir in the pumpkin, butter and vanilla.
  3. Stir dry ingredients together and add to egg mixture.
  4. Mix well.
  5. Stir in the zucchini and nuts.
  6. Divide into pans and bake 45 to 50 minutes or until the loaves test done.
  7. Cool in pans ten minutes before removing to wire racks to cool completely.
I hope all of you enjoy your week!

Monday, October 3, 2011

Savoring and Saving

A variety of herbs that I harvested from my garden.

This week has felt more like fall. It has rained quite a bit and it is starting to get cooler. As we start planning for winter we think about savoring the bounty of the harvest and also about saving as much as we can to eat throughout the winter. Although we still buy groceries we do try to can, freeze and dry what we can to eat in the winter. These are always wonderful treats that do save a lot of money.

In this difficult economy where nothing is certain it is such a good feeling to have many jars of lovely preserves on the shelves and freezer with some bags of vegetables or tomatoes ready to be used in some lovely dishes. In our family we have decided to try to eat more at home. We tended to eat out a lot on the weekends and although it is fun, it is costly. We want to save up for a vacation next year as well as a few house projects so I have begun to meal plan more and save more produce to use in our meals.

I have been amazed at how many tomatoes I have been able to harvest from my 5 tomato plants in my garden. Already I have frozen 8 quarts of tomatoes. I found out from an article online that I could freeze them whole on a metal tray and then transfer them to freezer bags. I am doing the same thing with herbs from my garden so that I can use them in various dishes later on. I'm happy to know that I can so easily freeze my produce like this as my time is getting shorter this time of year with preschool duties, teaching and housework.

Suburban Garden:

Last Saturday I went to a work party to help with various chores at Adam's preschool- Creative Children's Center. As I weeded the garden with other moms from the school it inspired me to do more clean up in my own garden. Last weekend I trimmed back some bushes, weeded, and pruned my rose bushes in the back yard.

Along with that I harvested a few more apples, tomatoes and herbs from the garden. I am going to try to harvest as many tomatoes as I can- even though they may not be fully ripened as I can bring them in the house to ripen fully. After that I will freeze them. I also packed some sun dried tomatoes that my mom had given me in jars along with some fresh basil leaves, salt, chopped garlic and olive oil. This makes a delicious treat poured over some hot pasta.

A bowl full of apples I harvested from the columnar apple tree.

Yet another bowl full of tomatoes I harvested from our small garden.


The leaves on the strawberries are already changing color.

A tray of tomatoes ready to be frozen.

A jar of sun dried tomatoes packed with fresh basil, garlic, salt and olive oil.

Rosemary, sage and basil on a baking sheet ready to be frozen.


Country Garden:

Last Friday we visited the country garden again and we were happy to see that there are still many fruits and vegetables left to harvest. My mom and I commented on how the harvest is very late this year but we are happy to have what there is. Soon after we arrived Grandpa Dale took Adam out to the orchard. Adam suggested to him "Take my hand and go." They went out and picked up hazelnuts from off the ground near the trees in the orchard and put the nuts into a bucket. Adam stuck with this activity for a long time and said it was "a great idea!."

We also checked out the plums which were ripe and ate some of those. They were delicious! It looks like they are ready to harvest.

The tomatoes keep coming and as of last Friday my parents had harvested about 65 pounds of them. They take them in to finish ripening on the counter of the kitchen and on tables until they are ready to can or freeze. We also looked at the garden and harvested some corn, beets and green beans.

Later on in the afternoon we took a walk in the woods and Adam enjoyed playing in the forest near a cedar tree. He loves to pretend he is in a tunnel. Later on, he borrowed my shoes and pretended to ice skate on the driveway. I love his imagination!

Adam with a hazelnut still in its husk.

A bucket full of hazelnuts that we collected from the trees in the orchard.

Large plums on the tree in the orchard.

Adam climbing up the ladder next to the plum tree.

My mom holding two very large plums.

Adam holding a very big beet that he pulled up.

A large beet that we harvested from the garden.

This head of cabbage looks like a painting to me- so many beautiful colors emerge.

I love how Adam loves to pretend and play in the forest.

Adam "skating" in my shoes!

We had a wonderful day harvesting and exploring at the country garden!

Cooking:

Since I have been cooking a lot more lately I am going to include a lot of the recipes for the meals that I have made in the past few days. Here is a sampling of our fall fare below.

A note about menu planning:

I have started doing something very simple each week so that I cook more often and always know what to fix for dinner. I got the habit of checking the refrigerator, freezer and pantry every Wednesday, choosing dishes to make based on what is there and what I would like to make and then I make a list of dinners. I make a list of 7 possible dinners with side dishes and a couple of ideas for weekend breakfasts. These dinners are not assigned specific days but are just a list of possibilities. That way, I can decide what to cook which day. Then, I make a shopping list of ingredients that I need to complete these meals. This is a good, easy system that seems to work for me and I love the variety of dishes that I create!


I have often thought how fun it would be to create menus for a cafe and cook a few things for them on occasion. I am not sure I would like to own the cafe, but to be able to create new dishes and tweak them would be fun! Right now I am perfectly content to create/tweak menus and recipes at home and share them with all of you. Enjoy!


Penne Pasta with Tomato Cream Sauce & Shrimp:

This is a recipe from Giada De Laurentis on Food Network. I changed a few ingredients but it is largely the same. I used fresh tomatoes instead of canned and I also omitted the parsley and the clam juice.

A lovely shrimp and tomato pasta using the bounty of our tomato harvest.

  • 1 pound penne pasta
  • 1/4 cup olive oil
  • 1 pound medium shrimp, peeled, and deveined (I used the uncooked, bagged frozen kind)
  • 4 cloves garlic, minced
  • 1/2 teaspoon kosher salt, plus extra for seasoning
  • 1/2 teaspoon freshly ground black pepper, plus extra for seasoning
  • 1 (15-ounce) can whole tomatoes, drained, roughly chopped (or I used fresh tomatoes)
  • 1/2 cup chopped fresh basil leaves
  • 1/2 cup chopped fresh flat-leaf parsley (I left these out and added more basil)
  • 1/4 teaspoon crushed red pepper flakes
  • 1 cup white wine
  • 1/3 cup clam juice (optional)
  • 3/4 cup heavy whipping cream
  • 1/2 cup grated Parmesan

Directions

Bring a large pot of salted water to a boil over high heat. Add the pasta and cook until tender but still firm to the bite, stirring occasionally, about 8 to 10 minutes. Drain the pasta and set aside.

In a large skillet, heat the oil over medium-high heat. Add the shrimp, garlic, 1/2 teaspoon of salt, and 1/2 teaspoon of pepper. Cook, stirring frequently until the shrimp turn pink and is cooked through, about 3 minutes. Using a slotted spoon, remove the shrimp and set aside.

Add the tomatoes, 1/4 cup basil, 1/4 cup parsley, and the red pepper flakes. Cook for 2 minutes, stirring constantly. Add the wine, clam juice, and heavy cream. Bring the mixture to a boil. Reduce the heat to medium-low and simmer for 7 to 8 minutes until the sauce thickens. Add 1/4 cup of the Parmesan, the cooked shrimp, the cooked pasta, and the remaining herbs. Toss together until all ingredients are coated. Season, to taste, with salt and pepper.

Transfer the pasta to a large serving bowl. Sprinkle with the remaining cheese and serve immediately.


Corn and Green Chili Chowder:

This is a family recipe that I have had in my notebook of recipes for a long time but I do not remember trying it until now. It is delicious!

A delicious corn and green chili chowder.

2 tablespoons butter
1 onion, chopped
3 cloves garlic, chopped or minced
1 yellow bell pepper, chopped and seeded
2 medium potatoes, unpeeled and sliced
4 cups chicken broth or vegetable broth, boiling
1/2 teaspoon cumin
salt
3 cups corn kernels
1 8oz. can green chilies, drained
1 jalepeno pepper, chopped (optional)
pepper

Garnishes:
Mexican cream or sour cream
Feta cheese or Mexican cotija cheese

1. Place 1 tablespoon of butter in a heavy pan over medium heat and saute the onion, garlic, yellow pepper and potatoes until onion is wilted, about 5 minutes. Add boiling chicken or vegetable broth, cumin and salt to taste. Continue to cook until the potatoes are soft.

2. Meanwhile place 1 tablespoon of butter in a large saute pan and saute the corn, chiles and jalepenos (if using) until just heated through. Add salt to taste and mix with the broth.

3. Puree the mixture in a a food processor in small batches. Pour through a sieve (if desired) to remove corn kernel skins. Adust seasoning with pepper and more salt if needed.

Serve soup with a swirl of Mexican cream or sour cream and a sprinkling of feta or cotija cheese. I served this soup with the cheddar biscuits- recipe follows:

Cheddar Biscuits:

This is a recipe I cut out of Bon Appetit magazine a long time ago. It also called for chives and bacon but I omitted those. This recipe makes about 12 large biscuits. I used some of the extra biscuits the next morning to make ham and egg breakfast sandwiches. They were delicious!

Fluffy and buttery cheddar biscuits.

Ingredients:

3 3/4 cups flour
1 1/2 tablespoons baking powder
1 1/2 teaspoons baking soda
1 1/4 teaspoons salt
1/2 cup (1 stick) chilled unsalted butter, cut into 1/2 inch cubes
2 1/2 cups cups (packed) coarsely grated sharp cheddar cheese
1 3/4 cups chilled buttermilk

1. Position rack just above center of oven and preheat to 425F. Line a heavy large baking sheet with parchment paper.

2. Combine flour, baking powder, baking soda and salt in a bowl using a whisk.

3. Add butter cubes to the flour mixture and cut in using a fork or a pastry blender until it forms a coarse meal. Add cheddar cheese.

4. Gradually add buttermilk, stirring to moisten evenly (batter will feel sticky)

5. Drop a generous 1/2 cup of batter onto the baking sheet for each biscuit.

6. Bake the biscuits until golden brown, about 18-20 minutes. Let cool and serve.


Spiced Pear Custard Pie:
This is a recipe I found online but I added more spices to it.

Spiced pear custard pie
Ingredients:
  • 1 (9 inch) unbaked pastry shell
  • 4 1/2 cups cubed peeled ripe pears
  • 1 cup sugar
  • 1/4 cup all-purpose flour
  • 2 eggs
  • 1/4 cup whipping cream
  • 1/4 cup butter or margarine, melted
  • 1 teaspoon grated lemon peel
  • 1 teaspoon vanilla extract
  • 1 teaspoon ground cinnamon
  • 1 teaspoon ground ginger
  • 1/4 teaspoon nutmeg
  • a pinch of cloves

Directions

  1. Line unpricked pastry shell with a double thickness of heavy-duty foil. Bake at 450 degrees for 8 minutes. Remove the foil; bake 3 minutes longer. Reduce heat to 350 degrees F.
  2. Place pears in pastry shell. In a bowl, combine sugar, flour and nutmeg. Whisk in eggs, 1/4 cup cream, butter, lemon peel and vanilla. Pour over pears.
  3. Cover edges loosely with foil. bake for 50 minutes or until filling is just set (mixture will jiggle). Cool on a wire rack for 1 hour. Cover and refrigerate until serving.
You may serve the pie with sweetened whipped cream of our favorite- vanilla ice cream!

Cooked Cereal Bread:

This recipe is one from my "Beard on Bread" book by James Beard. I changed the recipe a bit and added more cooked cereal and less flour. It made a very nice soft bread!


Ingredients:

1 cup cooked whole grain cereal- cooled (I used Bob's Red Mill Apple Cinnamon Hot Cereal)
2 tablespoons active dry yeast
1/3 cup warm water
1/4 cup softened butter
1 1/2 tablespoons salt
2 tablespoons molasses
2 tablespoons honey
1 cup milk
1 cup whole wheat flour
3 + cups all purpose unbleached flour (I prefer King Arthur)

1. Cook the cereal according to the package directions. You may end up with extra cereal to save and eat later. Save out 1 cup of the cooled cereal for the bread.

2. Dissolve the yeast in the warm water in a large mixing bowl and let proof.

3. Then, stir in the butter, salt, molasses, honey and milk into the cooled cereal. Cool to lukewarm, then add to the yeast mixture.

4. With a large spoon start stirring in the flours, one cup at a time. When the dough is stiff enough to work, turn out onto a floured board and knead for 10-12 minutes. Make sure not to add too much extra flour to the dough. The dough will remain slightly tacky.

5. When the dough is smooth and elastic, shape into a ball and put into a greased or buttered bowl and let rise until doubled in bulk, about 1 1/2 hours. (I let my dough rise for an hour or so, and then I placed the dough into the refrigerator overnight since I didn't have time to bake the bread that evening.)

6. Punch down the dough and form into 2 loaves. You may place them into well greased 4x8 pans or 9x5 pans according to what size loaves you would like. I form loaves by dividing the dough in half and then rolling it with a rolling pin. After that I roll up the dough into a log shape and place it into the loaf pan.

7. Let the loaves rise again until doubled in bulk or until the dough reaches the tops of the pans.
(I was able to let the dough rise for a short while in the pans but then I needed to go help at Adam's preschool so I put the rising loaves into the fridge again until I returned. ) I let them rise a while longer before I baked them.

8. Bake the loaves in a 375F oven for 30-35 minutes or until the loaves sound hollow when tapped on the bottom. Cool on a rack.

Enjoy! I made a peanut butter and jam sandwich out of this bread and it was fantastic!

Pretending & Imagination:

I love the face that Adam has a very active imagination. He often likes to act out scenes from books or cartoons. Below in the photo he has contructed a "snort" from "Are you my Mother?" by P.D. Eastman, a book that he likes to have read to him. I love how he used a bed post for some of the machinery. He liked to sit in it and drive it as well as drive it together with me. He also constructs castles and other creations from his blocks. I enjoy every day with him and I love to see what he discovers. The other day when I got out the vacuum he noticed that he could use the vacuum to hold onto blocks. He laughed with delight at this fun discovery and had a great time suctioning up blocks with the vacuum hose! Every day is a new adventure with Adam! I want to treasure and remember all of these special, learning moments with him!

Adam riding on his "snort" that he made out of sofa cushions and pillows.


Adam inside his castle.

Have a wonderful week! Enjoy your day to the fullest!

Tuesday, September 27, 2011

Harvest and Preservation

Adam with a bowl full of tomatoes he picked from our back yard garden.

This week we have seen a change in weather. It started out fairly sunny and warm and then we have gotten some rain, wind and cooler temperatures in the past few days. It starting to really look like fall around here. However, with the late gardening season we are still working on harvesting and preserving some things from the garden as they ripen and mature.

Although I am happy that we finally got a nice, warm summer I am glad that fall is here. I love the cozy feeling that comes with harvesting and enjoying the summer's bounty. This past week we have had many adventures here in the suburbs, in the country and out on the Oregon coast. We have been enjoying the best this area has to offer and we are so lucky to live here!

Suburban Garden:

Since I have been very busy this week canning pears the only thing that we did in the garden was to pick tomatoes. One day when I came to pick up Adam from preschool he asked me about the tomatoes in the school garden. He asked "Are they ready yet?" I said that some of them were ready but they were not ours. I did say that we had some tomato plants in our garden and we could pick those. So, later on that afternoon we took our bowls out and picked tomatoes. It was great fun! Adam even said "This is so much fun!" He really enjoyed picking lots of tomatoes and seeing which ones were ripe. He loves to take a big bite out of the tomatoes too! Yum! I was so happy that we already had such a great harvest from only 5 plants! I was amazed that everything did so well despite the fact that I had almost completely ignored most of the garden and yard in the past few weeks because of being so busy with canning.

A big bowl full of tomatoes from our garden.


Adam with a tomato he just picked out of the garden.


Country Garden:

Last Friday we visited the country garden again and many vegetables and fruits are getting ready to harvest. Because of the rain we had the previous weekend many of the cornstalks had fallen down because they got so tall and had a hard time in all of the rain and wind. However, there are still so many great things to harvest and with any luck we will be able to harvest some corn in the next few days. As you can see from the photos below many of the vegetables in the garden have small yields but many more like the tomatoes and grapes will give us a lot to harvest and preserve. My mom has been doing a lot of canning and drying lately. She has canned and dried over 50 pounds of tomatoes so far as well as dried large quart bags full of pears. Later on in the season I will post the totals of all of the canned/frozen vegetables and fruits we have preserved. It is a lot of work to do but well worth it when we think of how well we will be eating this winter!

Also on this lovely Friday Adam got a chance to "drive" the tractor by himself by steering the wheel. Luckily the tractor goes very slowly so Grandpa Dale walked alongside Adam and corrected his steering along the way. Adam was so thrilled to be able to drive the tractor almost by himself! He also got to take a very short ride on Grandpa Dale's motorcycle down the driveway and back slowly- what a thrill for him! He said that it was "the best ride ever" just like the tractor ride!

Adam walking through the "corn forest" in the country garden.

A small cauliflower forming inside the plant.


Small brussels sprouts forming on the branches of the plant.

A large winter squash forming on the vine.

A bell pepper.

Green beans ready to harvest.

I love the look of these heirloom tomatoes on the vine.

Some lovely grapes that we will use to make delicious juice.

An amazing and beautiful head of cabbage.

Some sweet green grapes that are almost ready.

Adam eating grapes from the vine. He ate a whole bunch by himself!

A beautifully shaped old apple tree on the edge of the orchard. These apples make great cider!

Apples on the old tree. They are almost ready to harvest!

Grandpa Dale and Adam on Grandpa's motorcycle.

Adam "driving" the tractor with Grandpa Dale by his side in the orchard.

Adam was so proud to be able to steer the tractor himself.


A Trip to Cannon Beach:


Me with Adam and Paul near the tide pools at Cannon Beach.


The weekend before last we took a trip to the coast with some friends of ours. We rented a house together in the Cannon Beach area. Although it was sunny on Friday, Saturday and Sunday were rainy, cold and windy. We still made the most of it as Adam loves to go into the ocean and doesn't seem to mind the cold. One of the days we all headed out to the tide pools and saw sea stars, sea anemones and mussels. It was so magical!

Griffin and Adam on the train.


We also rode the scenic coastal railroad from Rockaway Beach to Garibaldi and back. Both Adam and our friend's son Griffin really enjoyed the train.

Paul with Adam in the ocean. Adam loves the waves!

Every day, rain or shine Adam loved to go into the ocean waves. He does not seem to mind the cold and really loves the water. I can imagine him doing lots of water sports as soon as he is able to swim! It is a wonder and a delight for me to see how fearless Adam is and how much he enjoys everything!

Spiced Ginger Pears:

A jar of the spiced ginger pears that I canned.

This canning season I wanted to can pears but I got bored with the thought of plain canned pears. So, I came up with this spiced pears recipe that is so delicious! These pears are great with breakfast or spooned over vanilla ice cream! Yum!

Spiced Ginger Pears:

This recipes yields around 2 quarts of pears.

12 cups pears- peeled, cored and chopped into small pieces
-lemon juice
1/2 cup chopped candied ginger
1 cinnamon stick
1/2 cup brown sugar

As you cut the pears place them in a dutch oven or cooking pot. Pour lemon juice over the pears as you cut them and stir them occasionally so that they don't brown. Once you have all of your chopped pears done, add the cinnamon stick, brown sugar and candied ginger to the pot. Stir it thoroughly and cook on the stove on medium heat until it bubbles and simmers. Ladle the pears into hot sterilized jars and seal. Process the jars in a boiling hot water bath for 15 minutes. Enjoy!


Making a Lantern:

Adam with some of the materials to make his lantern.

Last Friday Adam's preschool The Creative Children's Center had a lantern walk at a local park in the evening. A few days before we made the lantern at home. Adam loved cutting the paper, ribbons and fabric to decorate the soda bottle lantern. He also really loved dipping a brush in a glue/water mixture to glue the decorations to the lantern. Here are some photos of the process:


Adam cutting out paper to decorate the lantern while Paul looks on.

Adam ready to glue a piece of paper.

The finished lantern. Later we added a handle and put a small flashlight inside.


Paul and Adam on the lantern walk at Rood Bridge Park.

Sour Cream Whole Wheat Bread:

A loaf of the sour cream whole wheat bread.

Last week I was almost out of bread so I decided to make another different type of bread from the book I have by James Beard "Beard on Bread." I love this bread because it is very soft and has a great flavor. I changed the recipe a bit because I only had 1 cup of sour cream so I put in 1 cup of whole milk yogurt to go with it. Also, I substituted whole wheat flour for half of the flour in the recipe to make it healthier. Enjoy!

Ingredients:

4 tablespoons yeast
3 tablespoons granulated sugar
1/2 cup warm water
2 cups sour cream (or 1 cup sour cream + 1 cup whole milk yogurt)
1 tablespoon salt
1/4 teaspoon baking soda
2 to 2 1/2 cups all purpose flour
2 cups whole wheat flour

1. Combine the yeast, sugar, and water in a small bowl and allow to proof for 5 minutes.

2. Put the sour cream, salt, and soda in a mixing bowl. Add the yeast mixture.

3. Then add 4 cups of the flours, cup by cup, to make a very wet, sticky dough, beating hard with a wooden spoon after each addition.

4. Scrape the dough out onto a floured board. Lift the dough up and fold it over. Then, move the dough clockwise and repeat the folding process until the dough is not as sticky and can be worked with your hands. Add a little flour if needed to prevent sticking but do not add too much. This process will take about 10 minutes.

5. Place the dough into a clean, oiled bowl and let rise until doubled in bulk- about 2 hours. Punch down the dough.

6. Then, divide dough into 2 equal pieces and form into loaves. Place into greased 9x5 loaf pans. Cover and let rise until doubled in bulk.

7. Heat your oven to 375F. Bake the loaves for 30-35 minutes, or until the loaves sound hollow when tapped on the top and the bottom.

8. Let the loaves cool thoroughly before slicing.

Enjoy!


Note: I should have let the dough rise more in the pans before baking the loaves so they didn't rise as much as I would have liked. I was in a hurry that day- but the bread is still delicious!


Spiced Pumpkin Carrot Cupcakes:

Last Friday for Adam's preschool's lantern walk I made these cupcakes to share with the families after the walk. They were a big hit and I was glad everyone enjoyed them!

Spiced pumpkin carrot cupcakes with cream cheese icing.


Spiced Pumpkin Carrot Cupcakes or Layer Cake:

I found out about this recipe from my husband Paul who saw it made by Ben Starr on Master Chef. I made this cake to try it out this summer and we really liked it. It also makes excellent cupcakes. This recipe makes about 18 cupcakes or a 3 layer cake with 9 inch cake pans. Enjoy!

Wet Ingredients:

2 sticks butter, softened (do NOT use margarine)

1 ½ cups granulated sugar

½ cup brown sugar

3 large egg yolks

1 ¼ cups pumpkin puree

1 teaspoon vanilla

2 cups grated carrots

Dry Ingredients:

2 ½ cups all purpose flour (I use unbleached and I prefer King Arthur flour)

4 teaspoons baking powder

1 teaspoon baking soda

2 tablespoons ground cinnamon

1 tablespoon ginger

1 tablespoon ground cardamom

¼ teaspoon each nutmeg, allspice, cloves

1 teaspoon salt

Fold In:

6 egg whites

½ teaspoon cream of tartar

Frosting Ingredients:

1 8oz package cream cheese (room temperature)

1 stick softened butter

2-3 cups powdered sugar

1 teaspoon vanilla

1. 1. Grease your muffin tins with pan spray if making the cupcakes or line them with muffin papers. I also like to grease the muffin papers as well. If you are making the layer cake spray the bottom of the pan with pan spray then fit the bottom of each pan with a parchment paper circle and then grease the entire pan with pan spray. After that flour the pans by putting around a tablespoon of flour into each pan then then shaking out the excess into the sink.

2. 2. Preheat your oven to 325F.

3. 3. Beat the softened butter in an electric mixer until it is light and creamy.

4. 4. Add the granulated sugar and the brown sugar to the butter. Beat on medium speed for 3-5 minutes until it is light and fluffy.

5. Add the egg yolks to the mixture and beat for 3 more minutes.

6inAdd the pumpkin puree and vanilla and beat for 3 more minutes.

7. Fold in the grated carrots by hand or beat at a very low speed to incorporate them.

8. In a separate bowl combine with a whisk the flour, baking powder, baking soda, cinnamon, ginger, cardamom, nutmeg, allspice, cloves and salt.

9. Sift the dry ingredients through a sifter and add them to the wet ingredients in the mixer. Mix on the slowest speed until combined.

10. In a separate bowl or in a clean mixing bowl beat the 6 egg whites and the cream of tartar until stiff peaks are formed. Start out at a very high speed but slow down to a lower speed once the egg whites change from a yellow color to a very white color. Once the egg whites reach the stiff peak consistency gently fold in 1/3 of them into the batter by hand using a rubber spatula. Then, add the rest of the egg whites into the batter until no more white streaks show.

11. Divide the batter evenly among the muffin tins/cups or cake pans. Bake the cake layers for about 30 minutes at 325F. Bake the cupcakes for around 20-25 minutes at 325F. Check the cakes with a toothpick- when it comes out clean without any batter clinging to it the cakes are done.

12. Remove from the oven and cool in the pans for 15 minutes. Then dump upside down (gently!) onto a cooling rack to cool completely. If you are making the layer cake you may want to freeze the layers for about 45 minutes after they are fully cooled to room temperature. This will make them easier to frost and assemble.

13. Meanwhile, make the cream cheese frosting:

Frosting Ingredients:

1 8oz package cream cheese (room temperature)

1 stick softened butter

3-4 cups powdered sugar

1 teaspoon vanilla

1. Cream together the cream cheese and butter with a hand or stand mixer on high speed until it’s light and fluffy.

2. Then slowly begin to add the powdered sugar 1 cup at a time until it is fully incorporated and the frosting begins to thicken up.

3. Add the vanilla. Beat on slow speed until the vanilla begins to get mixed in, then beat on the highest speed possible for 2 minutes to ensure a light and fluffy frosting.

To frost cupcakes:

I like to just add a swirl of the cream cheese icing in the center of the cupcake using a decorating tube filled with frosting. Then, I sprinkle large sugar crystals (like turbinado sugar) on top. Or, you may frost the entire top of the cupcake if you wish.

To frost a layer cake:

1. Place 1 layer of cake on a cake plate or stand- place it so the flat side/bottom faces up. Frost this side.

2. Add the second layer and repeat.

3. Add the final layer and then frost the sides and top of the cake. If the frosting is uneven or not smooth I like to decorate the cake with something like coconut or nuts to cover it up and add some interest. You could also add some frosting swirls or other decorations.


Souffleed Macaroni and Cheese:

I made this dish the other night for dinner alongside a large portion of steamed green beans from the country garden and some broccoli. It was delicious!


Souffleed Macaroni and Cheese hot out of the oven!

This is a recipe that I enjoy making in the fall and winter. It is a satisfying and comforting dish to serve alongside a large serving of steamed veggies or a salad! This recipe is one that I clipped from Gourmet magazine when it was still being published. This recipe can also be doubled to make a 13x9 casserole size.

Ingredients:

1 1/2 cups scalded milk
1 cup soft bread crumbs (you can also use whole wheat bread to add some whole grain)
1 1/2 cups grated sharp cheddar cheese
1 cup cooked macaroni (I used whole wheat shell pasta)
3 large eggs, separated
1/4 cup diced red bell pepper
3 tablespoons chopped onions
3/4 teaspoon salt
3 tablespoons melted butter


-Pour hot milk over the soft bread crumbs; add cheese. Cover and let stand until the cheese melts. Add macaroni. Combine and add beaten egg yolks, bell peppers, onion, salt and melted butter.

-Beat egg whites until stiff but not dry and fold into mixture. Pour into a buttered 1 1/2 quart casserole dish. Bake at 350F until puffed and golden, about 35 minutes.

Enjoy the beginning of the fall season and have a great week! Next week I'll return with gardening news, recipes and more!