Wednesday, June 30, 2010

A New Adventure in Sourdough


Last week when my Mom came to visit she brought me some of the cookbooks that she didn't want anymore. Among them was one that I was very excited to receive..."Bread Winners Too- The Second Rising" by Mel London. I looked for some sourdough recipes in the book and found several that intrigued me. I was looking to make a lighter, airier loaf worthy of toast and sandwiches and I found a recipe for a whole wheat sourdough brioche bread. So, yesterday I decided to make it and I'm so happy with the results. The above loaf is one of the two that resulted from my efforts and it was well worth it!

Below is the recipe along with my notes about the slight changes I made and the advice I give about making this bread:

Whole Wheat Sourdough Brioche Bread:

Adapted from "Bread Winners Too- The Second Rising" by Mel London

2 cups whole wheat sourdough starter
1 tablespoon yeast
1/4 cup warm water
3 cups milk
3 large eggs- separated
2 tablespoons honey
1 teaspoon coarse salt
9-10 cups whole wheat flour
1-2 cups unbleached all purpose flour
1 cup butter, softened

1 egg yolk, beaten or 1/4 cup milk or cream for brushing loaves

2 small loaf pans

1. Mix the yeast and warm water in a bowl. Let it set for 5-10 minutes or until it looks frothy.

2. In a large bowl, mix the starter with milk. Beat the egg yolks separately and then add to the dough. Then, add the yeast and water mixture. After that add the honey and salt. Beat in half of the flour.

3. In another bowl, beat the egg whites until fluffy and then fold them into the dough. I beat mine by hand with a whisk but you can also use a stand mixer for this. Add the remaining flour slowly and knead well. If the dough seems too sticky and wet add more flour.

4. Knead on a floured surface for 8-10 minutes or so. Then, put the dough into a floured bowl, cover and let rise until doubled in bulk. I let my dough rise about 4+ hours for this first stage. Below is a picture of my dough. I let it rise outside for a while during the time it was sunny.


5. Punch the dough down and work in the butter. The dough will be very moist, but work all of the butter in until it is no longer visible. Make sure it is all absorbed. This will take a few minutes.

6. Spray 2 small loaf pans with non-stick spray or butter them. Form 2 loaves out of the dough and place them in the pans. Cut slits in the tops of the loaves and brush with beaten egg yolk, milk or cream. Place in a warm area to rise another 3-4 hours.

7. Place a pan of water in the bottom of the oven. Preheat the oven to 500F. Reduce the heat to 450F and then put the loaves in to bake. Bake for about 40 minutes to 1 hour or so. The tops will brown quickly, so during the last half of the baking time put a piece of foil over each loaf. Cool loaves on a wire rack.

My Notes:

The original recipe did not call for yeast. During the first rising period my dough didn't rise much, so I added the yeast after the first rising instead. In my version of the recipe here I add it at the beginning. I think it helps because otherwise the dough is so dense with eggs and milk that the sourdough will take a long time to rise the dough.

Another problem I had that I solved quickly before it was too late was that I had originally formed the loaves into free form circles and put them on baking sheets. During the second rise they spread out and were forming big "pancake-like" loaves. I didn't want this effect so I scooped up the dough and put it into the loaf pans instead. This made the bread much better!

One final note is to double check to make sure the bread is done. You might even take a wooden skewer and insert it in the center. I was fooled by my larger loaf of bread because I sliced 2 slices and we had them with dinner, but when I went to make toast the next morning I noticed the bread was raw in the middle. I promptly popped it back into a loaf pan and baked it 20+ minutes more until it was done. It's never too late to correct your mistakes!


Enjoy your bread and happy baking!

Monday, June 28, 2010

Pie in the Sky


We had the perfect weekend for a family barbecue and that occasion called for homemade pie! I had been waiting all winter and spring for the perfect moment to make & savor this particular pie. It was a strawberry rhubarb custard pie and it was heavenly! Since I was little I have always loved rhubarb. I used to eat the stalks straight from the plant. They were very sour but I loved it!


Now that my rhubarb plants (see picture above) are thriving I felt I could harvest some to make a pie. I was amazed that the stalks were so big I only needed around 2 large stalks to make this pie along with some strawberries. Luckily I had made a pie crust ahead that I had frozen so it was ready to go!

I'm happy to say that this pie turned out wonderfully and it was delicious! It is based on an old family recipe that my grandma used to make for rhubarb custard pie. I just added half strawberries and half rhubarb. Here is the recipe and my notes. Enjoy!

All Butter Pie Crust:

Pie Crust: Makes 2 large (10 inch) or 3 small (8 inch) single crust pies. ( I prefer my crust to be fairly thick and have a lot of room for crimping around the edge.)

5 cups all purpose flour
2 teaspoons salt
2 teaspoons sugar
1 pound- 4 sticks cold butter cut into small pieces
1 cup ice water

Mix dry ingredients together in a food processor. Cut in butter until coarse crumbs appear. Pour in ice water slowly until combined. Make 2 large disks out of the dough & wrap in plastic. Refrigerate at least 1 hour. After 1 hour let dough set on counter for about 15 to 20 minutes until pliable.

May be frozen as dough or made into pie crusts & frozen.

Strawberry Rhubarb Custard Pie:

Pie Filling:

1 1/4 cups sugar
1/4 cup flour
2 cups chopped rhubarb
2 cups chopped strawberries
2 eggs- beaten

Streusel:

1/4 cup flour
1/4 cup oats
1/3 cup brown sugar
3 tablespoons soft butter

Bake pie shell in a 450 F oven for 5 minutes. Remove and cool while making the pie filling.

For filling, in a mixing bowl combine sugar and flour. Add the rhubarb and strawberries; toss to coat. Let stand for 15 minutes, stirring once or twice.

Beat eggs slightly with a fork. Stir into rhubarb mixture. Transfer mixture into pie shell.

Mix streusel ingredients with fingers until crumbly. Top pie with struesel. Cover entire pie with foil and place on a baking sheet. Reduce oven temperature to 375 F. Bake for 30 minutes. Take the foil off and bake for another 30-35 minutes. Make sure the middle is mostly set. It will be slightly soft but will set more upon cooling. Put the foil back on if the pie crust is browning too much. The pie may need an additional 15-20 minutes baking time depending on if the filling is mostly set or not.

Enjoy your lovely pie!

Friday, June 25, 2010

Succotash Row


Summer's here at last!! We finally finished up our planting today after many fits and starts. We were so excited today to have a chance to get everything in the ground and get the garden off to a good start. Since so many of the plants take a while to mature, we wanted to be as quick as we could to get everything planted. In the weeks to come we can weed, clean up some areas and do some general maintenance as well.

Here is our report about what we have planted over the last couple of weeks:

On June 18, 2010 my Mom (Serena) planted some sunflowers and melons. Here are the details of what she planted:

1. 2 1/2 rows of Tarahumara Sunflowers.

2. 4 Noir des Carmes plants

3. 3 Sweet Granite Melon plants

4. 1 1/2 rows of Mongolian Giant Sunflowers

5. 1 Siberian Watermelon Plant

6. 2 rows of Titan Sunflowers

7. 3 Charentaise melon plants

Later on June 23, 2010 my Mom was able to plant a few more things to get a head start since it has been dry and warmer for a few days now. She planted:

1. 1 row of Lettuce Mixture- 45 days to maturity

2. 1/4 row of Lettuce- Pot and Patio Blend- 45 days to maturity

3. 3/4 row of Royal Burgandy Bush Beans- 52 days to maturity

4. 1 row of Pak Choi- unknown days to maturity

5. 1/3 row of Pak Choi and 2/3 row of Dragon's Tongue Beans- 55-60 days to maturity

6. 1 row of Red Russian Kale- 50 to 60 days to maturity.


Then, today- June 25, 2010 it was a dry and overcast day in the upper 60's but a fine day to finish up our planting. We planted many rows of seeds including:

1. Sweet Genovese Basil- 55 days to maturity

2. Bulls Blood Beets- 55 days to maturity

3. Danver's Carrots: 65-87 days to maturity

4. Nelson's Carrots: 65-87 days to maturity

5. Black Coco Bush Beans for snap and drying: 95 days to maturity

6. Tongues of Fire Cranberry Bush Beans for drying: 75 days to maturity

7. Calypso or Yin Yang Bush Beans for drying: 70-90 days to maturity

8. Swedish Brown Beans for drying: 82-95 days to maturity

9. Hutterite Soup Bush Bean for drying: 80-85 days to maturity

10. Santa Maria Pinquito Bean for drying: unknown days to maturity

11. Kentucky Wonder Pole Bean: 75 days to maturity

12. 1/2 a row of Blue Lake Pole Beans

13. Christmas Lima Beans: 71 to 80 days to maturity

14. Scarlet Runner Pole Beans: 70 to 75 days to maturity

15. True Red Cranberry Pole Beans: 70 to 75 days to maturity. These adapt well to the cold.

16. Bantam Corn

We planted some rows of corn during the time that it was cold and wet but none of it has come up. Since the sunflower seeds that we planted around the same time came up and the corn has not, we guess that it won't. That is why we planted more corn over by the pole beans. By now you are probably wondering why we titled this post "succotash row", well it is because we did part of a row of corn along with a row of beans and it is one of our favorite vegetable dishes!

In other news, the potato plants are looking really nice and getting tall. Also, we were able to harvest and eat a few of the peas. The tomato plants are looking good and getting much bigger as well. The raspberries are ripening but the plants are looking a bit on the yellow side, so we need to figure out what is ailing them.


Suburban Garden Report:

Over on the other side of town, things are mostly going very well in my garden. My rhubarb is getting big enough now where I am going to harvest some this Saturday to make a strawberry rhubarb pie. I will post the recipe later on with some photos! Also, it has been fun to go into the garden every morning with Adam and help him pick strawberries. He loves to sit down and pick the tops off and eat them. It's a joy to see him relish the strawberries this time of year!

In the other bed I have bad news! The squirrels dug up all of the seed peanuts and took off with them. Also, in the process they dug up two of my sweet potato plants and they are now gone. But, at least the rest of my sweet potato plants are doing well. Our "sharecropper" pumpkin plant is really thriving and has even bloomed and has many buds on it.

That's our gardening news for this week!

Wednesday, June 23, 2010

Nutty Northwest Crunch

This week I found myself with plenty of bread still on hand and since the weather is starting to shape up and get sunnier I wanted to create a quick breakfast food and snack fit for warmer weather. So, I came up with this granola, a Northwest twist on an old childhood favorite of mine.

As a child I loved to cook too, and I had a great book called "Better Homes and Gardens New Junior Cookbook". It has a lot of healthy, simple recipes that kids can make in it. As an adult, I still use a lot of the ideas in it! And, soon when Adam's old enough he can make some of the recipes out of it too. You can tell that I made granola a lot because that page is very worn and stained!

Since I had a lot of hazelnuts and large flaked coconut leftover from our Farmer's Tea baking days, I thought I'd create a new granola out of those ingredients and other things I had on hand. Here is the recipe as well as some photos of the steps along the way:

Northwest Hazelnut Coconut Granola:

2 cups rolled oats
1 cup Scottish oatmeal or wheat germ
1/2 cup finely chopped hazelnuts
1/2 cup coconut
1 1/2 to 2 cups hazelnut butter (homemade or store bought)
1/2 cup honey
2-4 tablespoons canola oil
2 teaspoons coconut extract or vanilla
1/2 teaspoon salt

Preheat the oven to 300 F.


1. First, I made some hazelnut butter by blending in my food processor 2 cups of hazelnuts and a teaspoon or so of salt. I had to let the processor run for quite a bit until the nuts were well ground and started to form a paste or butter. Then, I put the mixture in a bowl and added a tablespoon or two of canola oil to moisten the mixture. Above is a photo of my hazelnut butter.


2. Mix the oats, Scottish oats or wheat germ, chopped hazelnuts, and coconut together in a 13x9 baking pan. (As shown above).

3. In a bowl, mix together the hazelnut butter, honey, canola oil, coconut extract or vanilla and salt. Pour this mixture over the oat mixture and use a rubber spatula to combine thoroughly.

4. Bake the pan of granola in the oven for 40-45 minutes. Mine was done at 40 minutes.

5. Take the pan out of the oven and mix the granola with a metal spatula to break up. Let it cool and then break up further if desired.

It makes a great snack and cereal! Enjoy!

Wednesday, June 16, 2010

Our Sourdough Saga


As you may know, I (Trista) and my mom Serena have been working with our sourdough starter for quite some time now. We have learned a lot along the way. My mom found out that her starter became stronger with the addition of whole wheat flour. She then shared some of her starter with me and I mixed it in with mine and added a bit more flour and water to it. I have kept it at room temperature for quite some time and it has become stronger as a result. I also did some research and found out that it is necessary to feed the starter once or twice daily (if you don't bake with it that day) in order to keep it going strong. This has made a huge difference and allowed my mom and I to have much more success with our sourdough starters and really enjoy using them!

Here are some of our experiences with sourdough recently:


(Pictured above is Trista's variation on Serena's "Whole Wheat Dutch Oven Sourdough Bread" recipe)

Serena’s sourdough experience on 6/6-7/10


Tried combining a sourdough recipe with the dutch oven beer bread recipe.

Changes:
Left out the yeast
Increased flour
Increased water

Notes:
Dough rose satisfactorily in the first rise of about 24 hours.
In the second rise, I added a warm stone to the bottom to accelerate rise.
The loaf was left in the oven too long, resulting in an overdone, thick and tough crust.
Interior remained moist, but looked as if it needed to rise more.
I added 1 Tbsp per cup of potato flour.

Recipe:
2 cups sourdough starter (whole wheat and water starter)
1 cup water
3 tsp salt
5-6 cups flour, half white and half whole wheat
1 tbsp per cup of potato flour

I mixed the starter with 1 cup of white flour, then added the water and after that was thoroughly mixed in, I added 2 cups of whole wheat flour, 1-2 cups of white flour, and then the salt. Check the dough, and add up to 1 cup additional flour – whole wheat suggested.

Shape into a ball and put in a bowl covered with clean towels or plastic wrap and leave at room temperature for a bout 24 hours more or less. Put a piece of parchment paper into a skillet, leaving the edges of the paper overhanging the pan. Remove the dough from the bowl and shape into a round. Place the dough round into the skillet and cover loosely with clean towels or plastic wrap, so there is room for the dough to expand.

At this point you will need to check the dough after about 3 hours. If it is rising, continue rising as is. If it is not rising much or at all, put the pan on a pizza stone. Continue rising 4-6 hours.

Preheat a covered dutch oven at 500 degrees in the oven. Slit the top of the loaf about ½” deep and 6” long with a sharp knife, then lift the bread dough into the dutch oven by the corners of the parchment and replace the lid. Place in the oven and reduce heat to 425 degrees. Bake 30 minutes, remove lid and bake an additional 30 minutes until 200-210 degrees on an instant-read thermometer, or till well-browned on top and golden brown all over.
Suggestions: To make this again, try decreasing the flour a bit. Try increasing the rise time after shaping the loaf.

Trista's Dutch Oven Sourdough Bread Experience- 6-15-10:

I (Trista) followed the above recipe (putting into practice what was learned) that my mom created for whole wheat sourdough bread but I changed it slightly.

Trista's Variation:

1 cup of buttermilk
1 cup of Scottish oatmeal

I heated the buttermilk for 1 minute in the microwave. I added the oatmeal to it and let it sit for 5 minutes. Then, I added it to the rest of the bread ingredients.

I let this mixture rise 24 hours.

Then, I transferred the dough to the skillet as outlined above. Because I had to go garden for the day the dough ended up rising for about 8 or so hours.

I then baked it in the Dutch oven in the same way.

It turned out very moist in side and had nice holes in the crumb. It rose nicely and had a nice sour taste to it! I like that it has a lot of whole grains in it yet it is very moist! I think the extra rise time really helped and the buttermilk and oatmeal kept the bread very tender.


Serena's Sourdough Pancakes: 6-15-10


I found a sourdough pancake recipe but I noticed that it had baking soda in it as well as sourdough starter. I didn't want to use the soda because I wanted to see if I could make the sourdough work and leaven the pancakes by itself. So, I modified the recipe by putting in more sourdough starter but otherwise basically following the recipe. I was puzzled by the addition of buttermilk to the recipe but I didn't have buttermilk so I just used sweet milk. I really like the results I got this time. Here is my basic recipe:

Sourdough Pancakes:

Makes: 14 small pancakes

1 cup sourdough starter
1 cup flour- unbleached all purpose or whole wheat
1 heaping tablespoon sugar
1/2 teaspoon salt
2 eggs
1 cup milk

Mix together and either place the bowl allow to come to room temperature. These are the methods I would suggest for this:

-cover the bowl and allow it to rest for an hour or so
-immerse it in a container of hot tap water- making sure that it does not overflow into the bowl
-place it on top of a warm pizza stone
-place it in an oven preheated to 240 degrees F and turned off.

These other methods should cut the time in half.

Bake the pancakes on a hot buttered griddle. Using a quarter cup measure pour onto the hot griddle. Watch for bubbles to appear on the surface and look for the edges of the pancakes to lose their shine before turning them.

Trista's Sourdough Sour Cream Pancakes 6-16-10:

Trista decided to make these pancakes tonight for dinner along with an omelet and some asparagus. Here is her variation to the recipe:

I put a 1/2 cup sour cream and a 1/2 cup milk in the batter instead of 1 cup milk.
I put 1 heaping tablespoon of brown sugar instead of the granulated sugar

They turned out great! I put the batter in the oven which I turned off after it reached about 200 degrees. I let it rest in there about 30 minutes. This method seemed to work really well! They were sour, moist and smooth and tasted amazing with butter and maple syrup!


June 16, 2010: 50 degrees daytime temperature!


The day started out dreary and cold as I (Trista) noticed my car's outdoor temperature reading was 50 degrees! It rained through this morning, but we thought we should try to do some gardening. I went for a walk with Adam while my Mom tried to plant some sunflower seeds. The sunflower seed packet said that they "tolerate drought and adverse conditions" and she wondered if "adverse conditions" included the opposite of drought. If so this row should thrive. She got half a row (about 6 feet) in before deciding that the soil was too squishy and she was afraid of ruining the dirt. (Later on we planted cucumber starts like the one pictured above). So, she joined us on our walk.

Our Walkabout with Adam:


We saw many pretty native plants and other sights on our walk down the driveway and beyond with Adam as he pulled along his favorite stick. He really enjoyed splashing in the puddles with his little yellow rain boots on the way down the road.


First, we came upon a beautiful rock covered in a thick green moss with a small fern growing in it. It's hard to know how this will look once the weather dries up a bit but right now it is beautiful.

Later, we saw some salal that was blooming. The branches with their pretty and shiny leaves are used a lot in florist arrangements. The flowers turn into small dark blue berries that are edible but bland.

Further up the road we saw a nice patch of sword ferns in among the trees. They like the cool, rainy weather so right now they are a brilliant green. Some of the old fronds from last year are dying. If you have one of these in your garden you would probably cut the old fronds off in early spring to leave room for the new ones to grow and flourish.


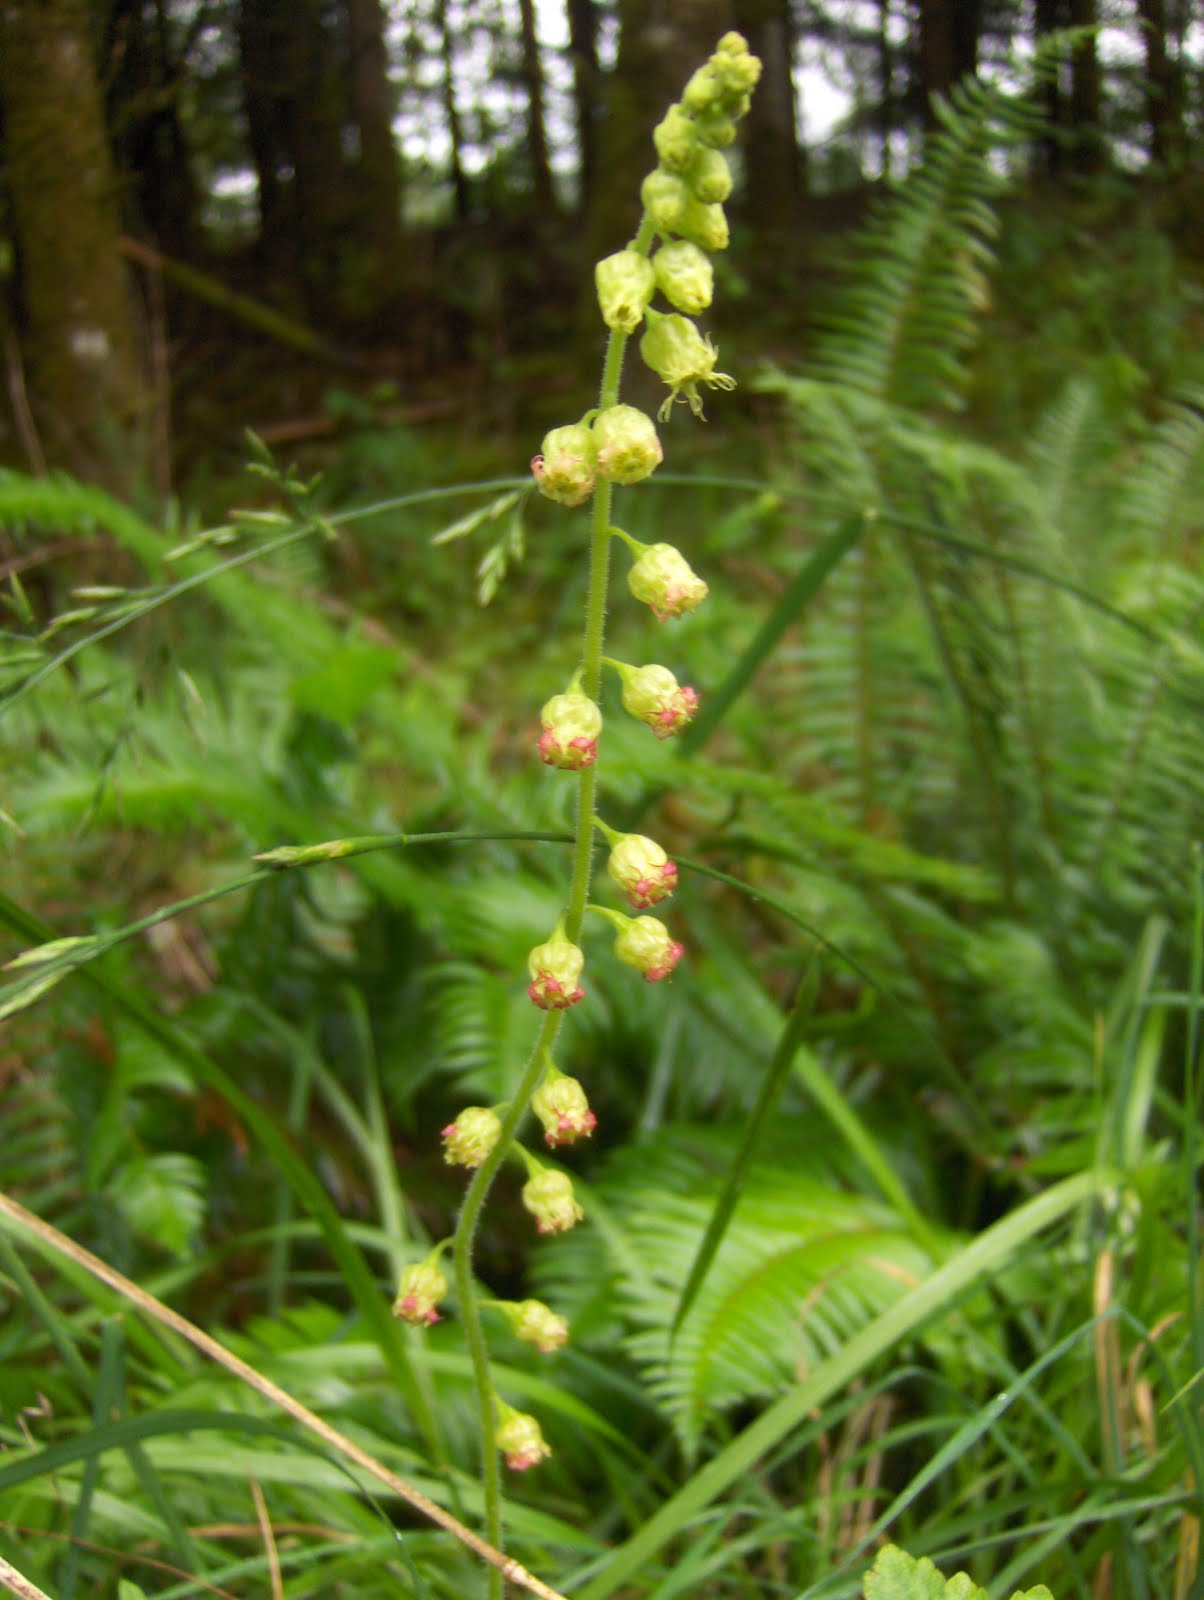
From there we saw a dainty and pretty piggyback plant. It has a long stem of little pink bell shaped flowers on it.


Tiny Garden Report:

Later on as Adam was napping we decided to tackle the garden to see what we could possibly plant in this weather. We planted a long row of Double Yield Cucumber plants. Then we decided the only way we were going to get any heat around here was to plant a small row of Jalapeno pepper plants. One of these pepper plants is pictured above.

Our Gardening Purpose:


We've always raised a garden and we've often canned, dried and frozen the harvest as well as eating a lot of it fresh. However, we never really tried to plan to grow the majority of our fruits and vegetables for the whole year.

After I read and then loaned to my mom the book "Animal, Vegetable Miracle" by Barbara Kingsolver in which the author and her family raised most of their food for the year in their large garden and supplemented it by buying only local foods, we were inspired to do something similar.

Last year I didn't participate but I watched my parents were raising a large garden and they are still using a lot of the proceeds from that garden. My mom and I talked about the book and decided to work together towards growing most of our fruits and vegetables for the year.

My mom worked really hard to preserve the bounty of the garden harvest last year and she made everything from stewed tomatoes to pickles and salsa.

Here is a complete list of what she made in the 2009 season:

Frozen Foods:

-strawberries- 12 packages
-blueberries- 7 packages
-hazelnuts- 3.5 quarts
-peas- 2 quarts
-green beans- 16 packages
-zucchini slices- 4 packages
-corn- 27 packages
-bell peppers- 4 one gallon bags
-jalapeno peppers- 3 one gallon bags
-tomatillos- 5 one gallon bags
- brussels sprouts- 2 bags
- brocoli- 2 bags

Dried Foods:

-cherries- 1 gallon bag
-pears- 2 gallon bags
- plums- 6 gallon bags
-mushrooms- 1 quart
-tomatoes- 1 quart

Canned Foods:

490 pounds of tomatoes were harvested in the 2009 season!

-tomatoes- 58 quarts
-tomato juice- 9.5 quarts
-salsa- 30.5 quarts
-tomato sauce- 22 pints
-BBQ sauce- 8 pints
-ketchup- 9 twelve ounce jars
-cider- 20 gallons

Pickled Foods:

-dill pickles- 11 pints
-sweet pickles- 23 pints
-pickle relish- 6 quarts
-pickled jalapeno peppers- 6.5 quarts

Jam:

-strawberry
-blackberry

From this list above you can see that we are very serious about producing most of our fruits and vegetables. Now that I am joining the effort we are trying to grow enough for two families. We have added a lot to our garden this year including potatoes, broccoli, cabbage and other crops that were not grown last year.

Tuesday, June 15, 2010

Give Us a Break!


This week was supposed to be relatively dry, but I think the weather folks are just trying to break the news to us gently - it's raining, yet again. This morning it was about 55 degrees, which was 3 degrees better than yesterday, and we are pitiful enough at this point that that actually seemed like good news. The blue sky peeking among mostly clouds seemed like a good omen for the day, but then again, we always try to look on the bright side.

We managed to get some corn seed in. I (Serena) checked to find out the maturity dates on all of the seeds we are planting. The corn, Golden Bantam Improved, is supposed to be ready in 78 to 85 days. We also decided to try some Stowell's Evergreen, a white corn, which is supposed to be ready in 80 to 100 days. At this point we have resigned ourselves to the longest date out.

Adam is not quite two, and is interested in the garden for about 15 minutes, then it's time to do something else. Trista and I thought we could get the corn in, and we did manage to plant some before we needed to go for a walkabout, Adam style.


We walked along the road, admiring native plants we came upon. Adam found a great stick to drag along, too. We saw some beautiful honeysuckle. (Pictured above) I think it has lasted more this year than usual, so there are benefits to this cold and wet weather.


The vine maples (pictured above) are leafed out, and their shapes are so pretty, whether in leaf or without. There is a nice dogwood growing between the vine maples, which are at the edge of the drive in a grove of douglas firs.


The thimbleberry (pictured above) is blooming, and mixed in are mossy areas with ferns. Definitely a feast for the eye! While wandering back, Adam petted a soft-leafed plant, and then hugged it. That's what you do with soft things, don't you? It was one of those moments that you have a camera in your hand, and although you still aren't quick enough to capture it, the vivid memory remains.

I had good luck last year in planting pumpkin and squash among the corn, so we planted our seedlings there. One of our seedlings is pictured above. We have 4 different kinds. They are:

Lady Godiva ( 90-100 days)
Musquee de Provence (100-110 days)
Thelma Sanders Sweet Potato Squash
(85-90 days)
Sweetmeat Hubbard (115 days)

That sounds like a lot of time, but since they are ready about the last of fall, we should make it. All we have to do with those is pick them when they are ready, and store them properly. We decided to get just one pumpkin for Halloween's sake - we hope there will be a perfect pumpkin for Adam.

Just about the time it began to rain, Trista finished getting the pepper plants in. One of our pepper seedlings is pictured directly above. We have:

Tolli's Sweet Italian (75-85 days from transplant)
Rooster Spur (95 days from transplant)
King of the North (70 days from transplant)
Ancho Gigantea (90 days from transplant)

We have high hopes for King of the North and the Sweet Italian, but it is going to be touch and go for the two others, as they are hot weather peppers, which doesn't seem to be our lot this year. I like the idea of the Anchos as they are fun to have stuffed, and the Rooster Spur looked pretty, so maybe we'll end up putting the plants in pots, which might warm them up too. For now, though, they are in the garden.

While Trista was making a mad dash to get the peppers in, I noticed our zucchini plants still in their pots so quickly dug some holes for them. The rain was beginning to dash us with giant drops, but our four zucchinis are tucked in the ground and getting watered in as I write.